
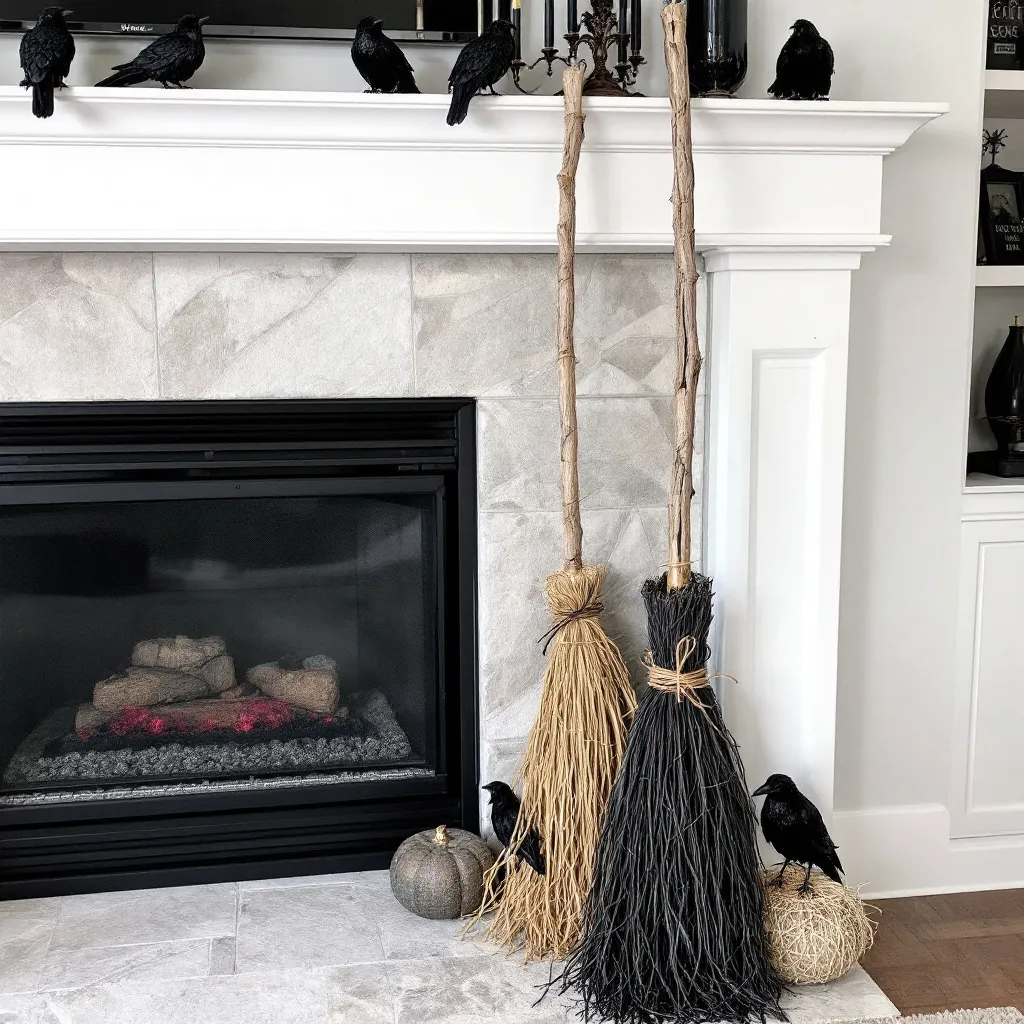
DIY Witch Broom for Halloween Decorations Outdoor or Indoor (Under $10!)
This DIY witch broom project gets 5/5 stars. The supplies were easy to find, cost under $10, and took less than half an hour to assemble. It’s one of those DIYs that saves money and sparks creativity at the same time.

DIY Witch Broom for Halloween Decorations Outdoor (Under $10!)
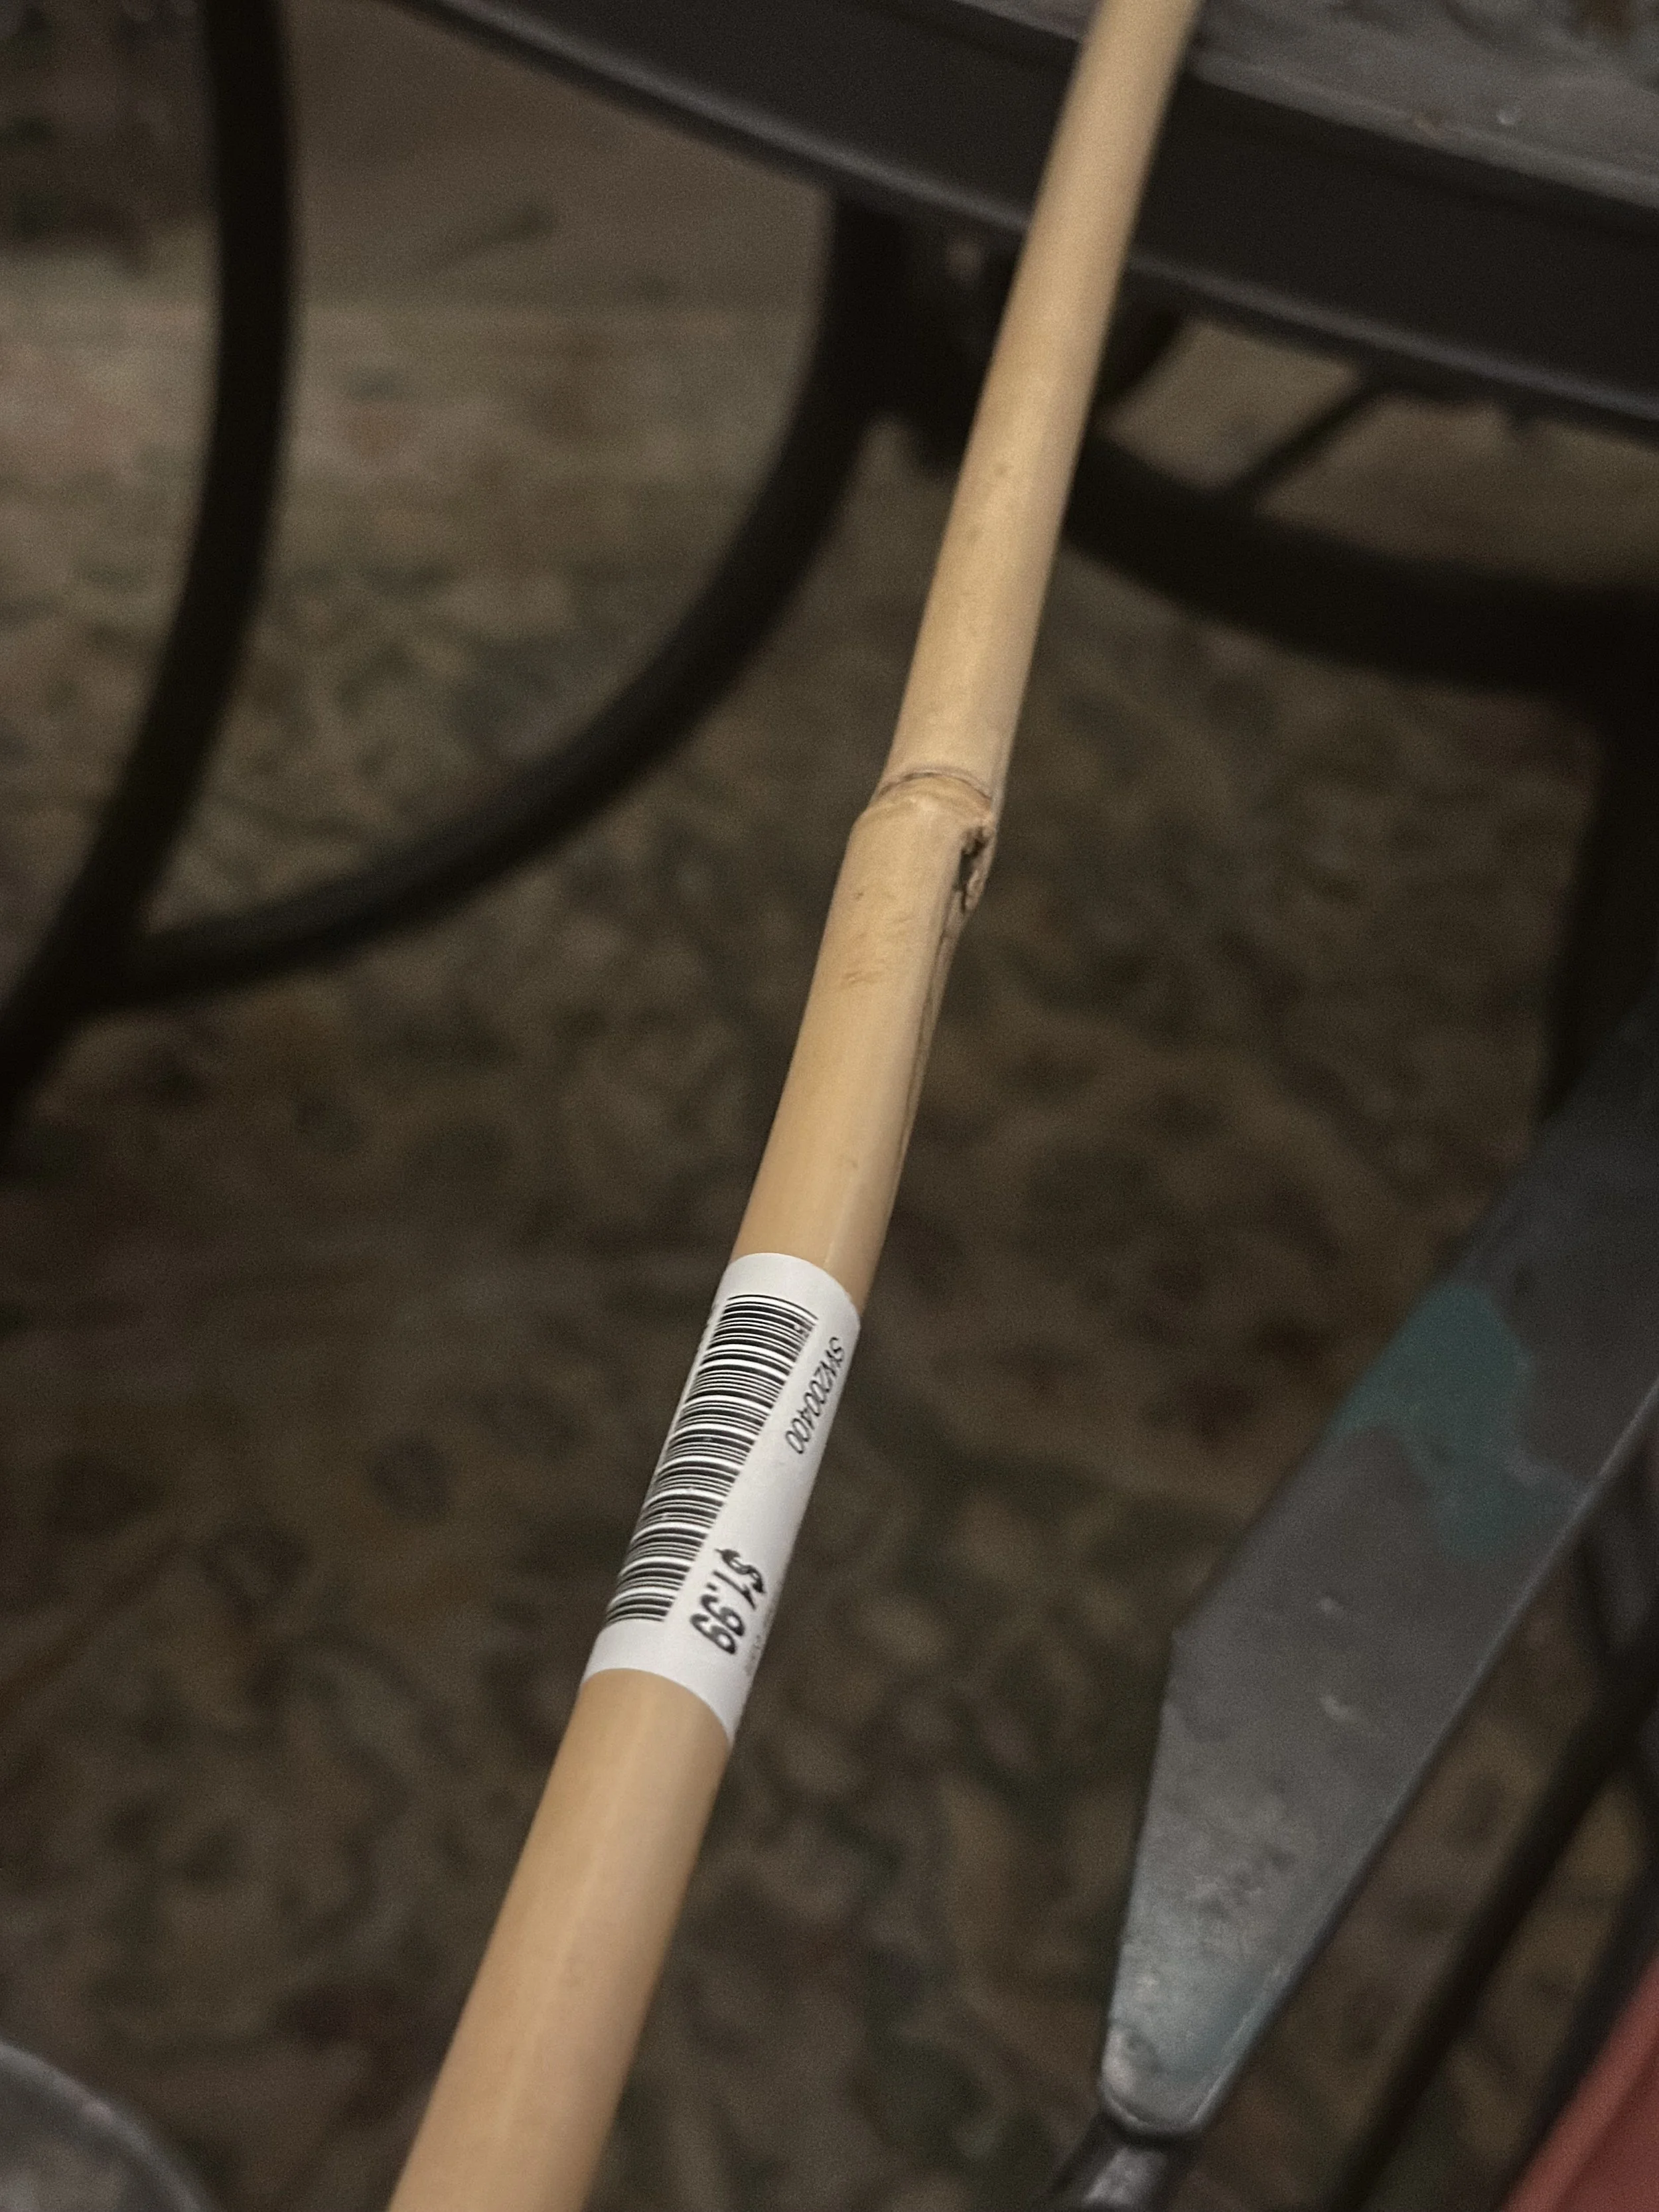
While shopping for a tree (how many times can you say that in a lifetime? Not many), I saw a Halloween witch’s broom that was $79 at a garden center made from bamboo, sticks and twine. I’m sure my fellow makers know what my first thought was. Scoff, oh, I can make that! I’m not sure if it is my desire to save a few dollars, or if it’s my competitive nature kicking in and I want to prove to myself that I can recreate items myself. Regardless of the motivation, I was picking up a bamboo stick for $1.99 from the same store, in no less than a minute after I spotted this brilliant, adorable, Halloween prop. Challenge accepted, self.


Supplies I Used
Bamboo garden stake (6ft, $1.99 at local garden center or Pack of 55 (5 ft tall) – $37 on Amazon)
Brown twine ($5.99 on Amazon)
Sticks from my yard (DIRTY HANDS FREE!)
Tip: If you prefer a classic black broom, or color, spray paint your sticks and pole before assembly. The stacked sticks make it hard to paint evenly after.
Step-by-Step DIY Instructions
Gather sticks: I found plenty under trees along my property line. Snap off little twigs and trim lengths to about 14”. Gather one more handful than you think you’ll need.
Spray paint (optional): Lay out on craft paper and paint if you want a black broom.
Lay the twine: Roll out about 4 ft flat on your table.
Bundle the sticks: Arrange in a circle, wrap tightly with twine to form the sweeping part of the broom.
Insert bamboo stake: Wiggle the stake halfway into the bundle. Use hot glue around the pole to secure.
Final touches: Tighten twine, add glue where needed, and touch up with paint.

This whole project took me just 30 minutes!
How to Use It in
Halloween Decorations Outdoor
Your DIY witch broom works perfectly:
Lean it by your porch pumpkins for Halloween porch decor
Pair with skeletons for spooky Halloween witch decor
Style with vintage Halloween decor or alongside giant Halloween decorations for big impact
Hang them from the ceiling, porch, or trees for floating broom effect
Have a designated “Broom Parking”
Final Thoughts
This DIY witch broom project gets 5/5 stars. The supplies were easy to find, cost under $10, and took less than half an hour to assemble. It’s one of those DIYs that saves money and sparks creativity at the same time.
Now the only question is… how many brooms does one witch need? The answer: So Many


The Mood Room
THE MOOD ROOM IS HERE! We have dust, we have dead links, but check back soon! An art haven is in the works! For the love of art, come back soon! Thank you XOXO- The Mood Room
Current Mood= Excited

Shelf Style: How to Accessorize Your Bookshelves Like a Pro
The links in this post are affiliate links. As an Amazon Influencer, I may earn a small commission from any sale associated with these links, at no extra cost to you. I hope you enjoy them as much as I love sharing them! Thank you for reading and
HAPPY SHOPPING!
XOXO
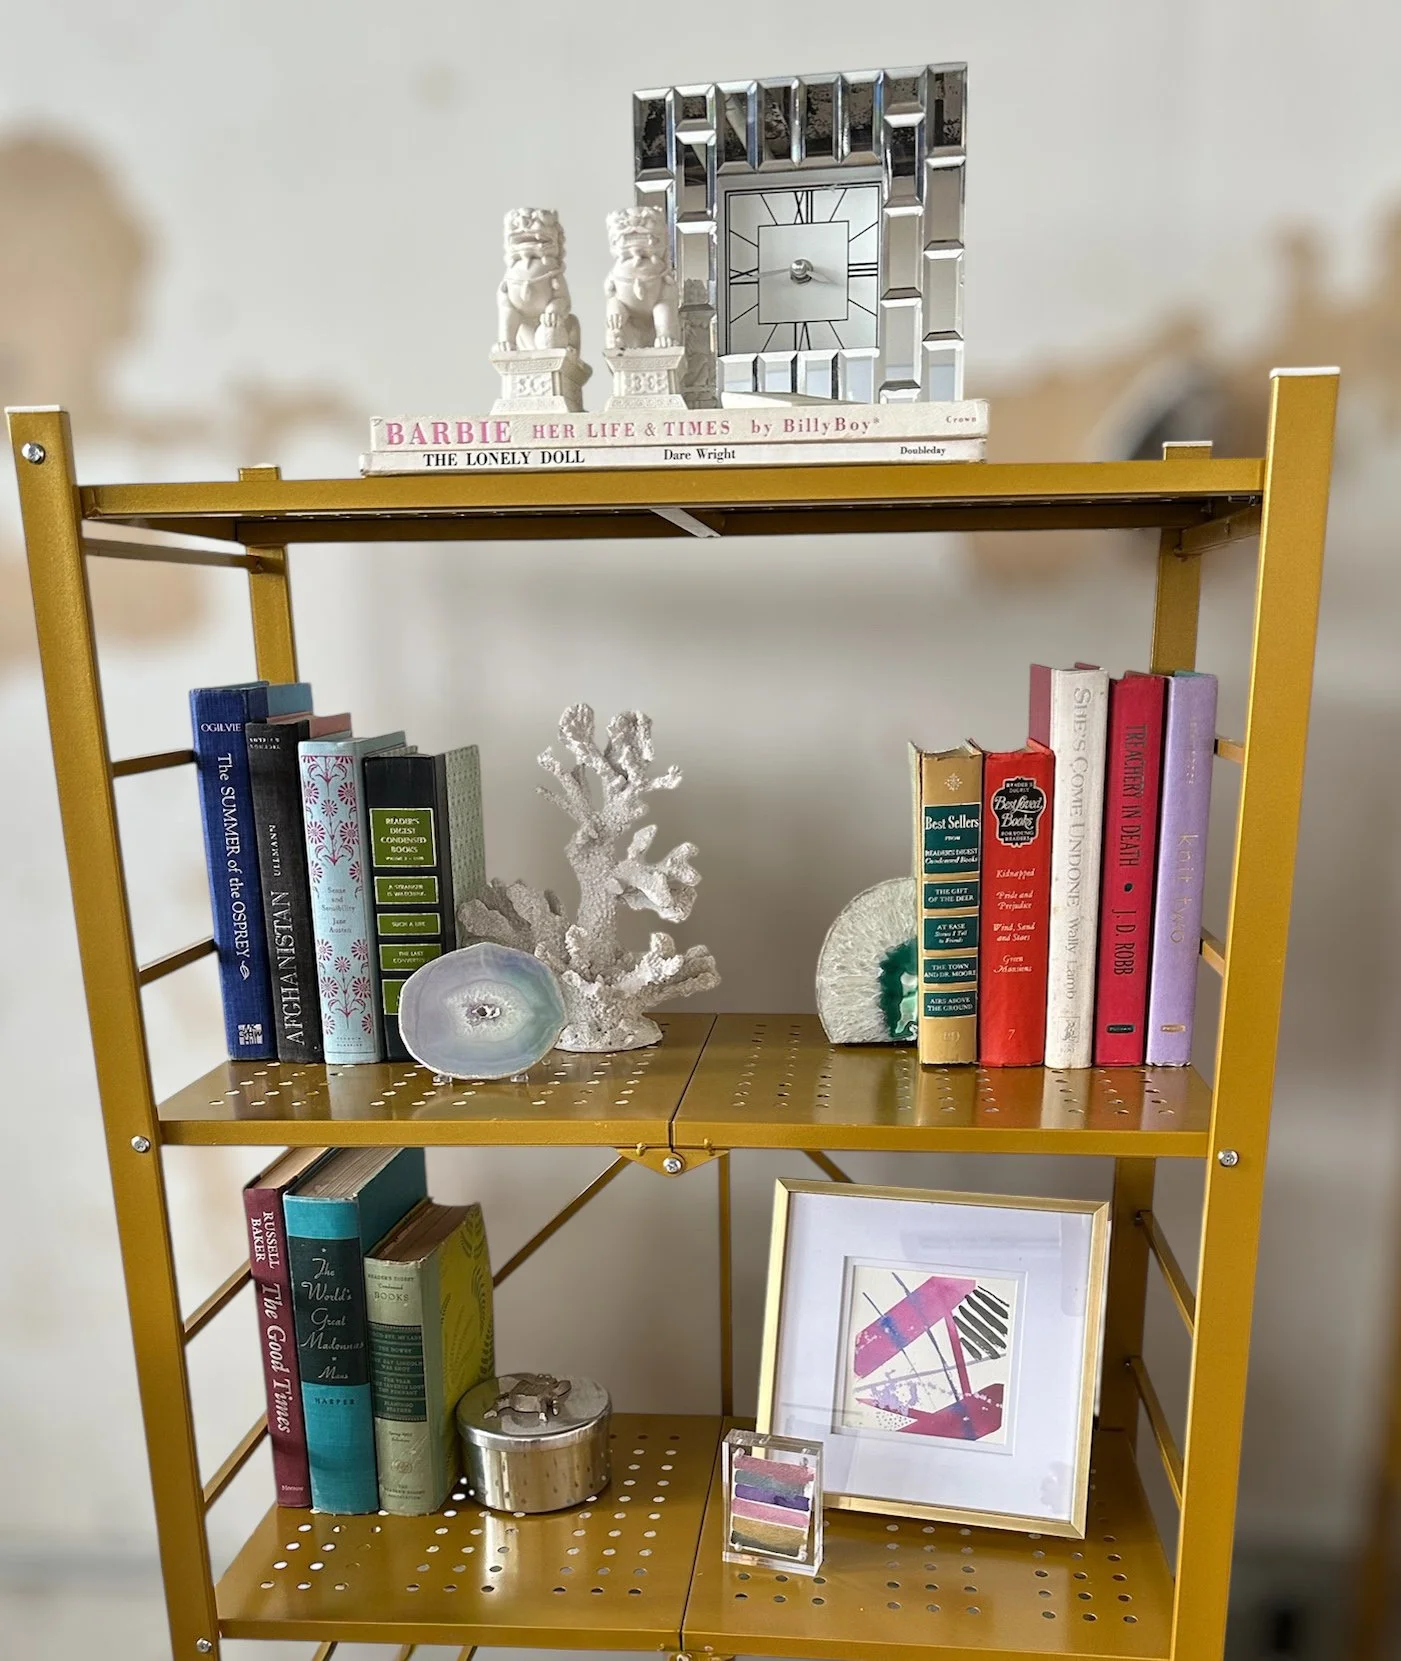
Bookshelves aren’t just for storing books — they’re a stage for your creativity and most importantly, the present an opportunity to bring your personality into your space. With the right mix of books, personal effects, and accessories, your shelves can look like they were styled by a pro.
In this post, I’ll show you the method I use to style my favorite book shelves and share a few simple techniques you can try. If you want to recreate the look, I’ve pulled together a list of accessories similar to the ones I use.
👉 Shop My Bookshelf Accessories Collection
Step 1: Start with Books as Anchors
Mix vertical rows with horizontal stacks. I love this trick. It helps me gain balance and order to my shelves. Stacks also double as pedestals for accessories, crystals, or sculptures — instantly adding depth and dimension.
Step 2: Mix in Art & Frames
Frames don’t just belong on walls — small photos or artwork layered behind books create depth and personality.
Step 3: Add Texture & Natural Elements
Plants, coral, or crystals soften the sharp lines of books and frames. Natural shapes bring balance and a little magic to your shelves.

Step 4: Play with Height & Balance
Balance tall items (lamps, vases, or sculptures) with shorter objects on the other side. Asymmetry keeps things interesting.

Step 5: Layer & Leave Space
Don’t push everything to the back. Layer objects — a frame on book, with a crystal. I learned to group things in groups of three. Three items are apparently visually pleasing. For example a book under a bowl —with three items arranged on top. A larger item, a smaller sized option and the smallest item along side of them. Don’t be afraid of empty space; it keeps your shelf from feeling cluttered.
Quick Styling Recap
Mix vertical & horizontal book stacks
Layer art, frames, and objects
Add greenery or natural textures (small plants, corals, crystals, wooden pieces)
Balance tall and short items
Use odd numbers (3s & 5s) for groups of decor
Let your shelves breathe with some equally negative space, or empty space
Shop the Look
Want to bring these ideas to life on your own shelves? I created one easy list with all my favorite bookshelf accessories:
👉 Shop My Bookshelf Accessories Collection
Affiliate disclosure: The links in this section are affiliate links. That means if you make a purchase, I may earn a commission — at no extra cost to you.
This collection includes:
✨ Decorative bookends
✨ Sculptural objects
✨ Frames & art accents
✨ Faux greenery
✨ Storage baskets and trays
Inside The Mood Room: the Making of a creative space
It all begins with an idea.

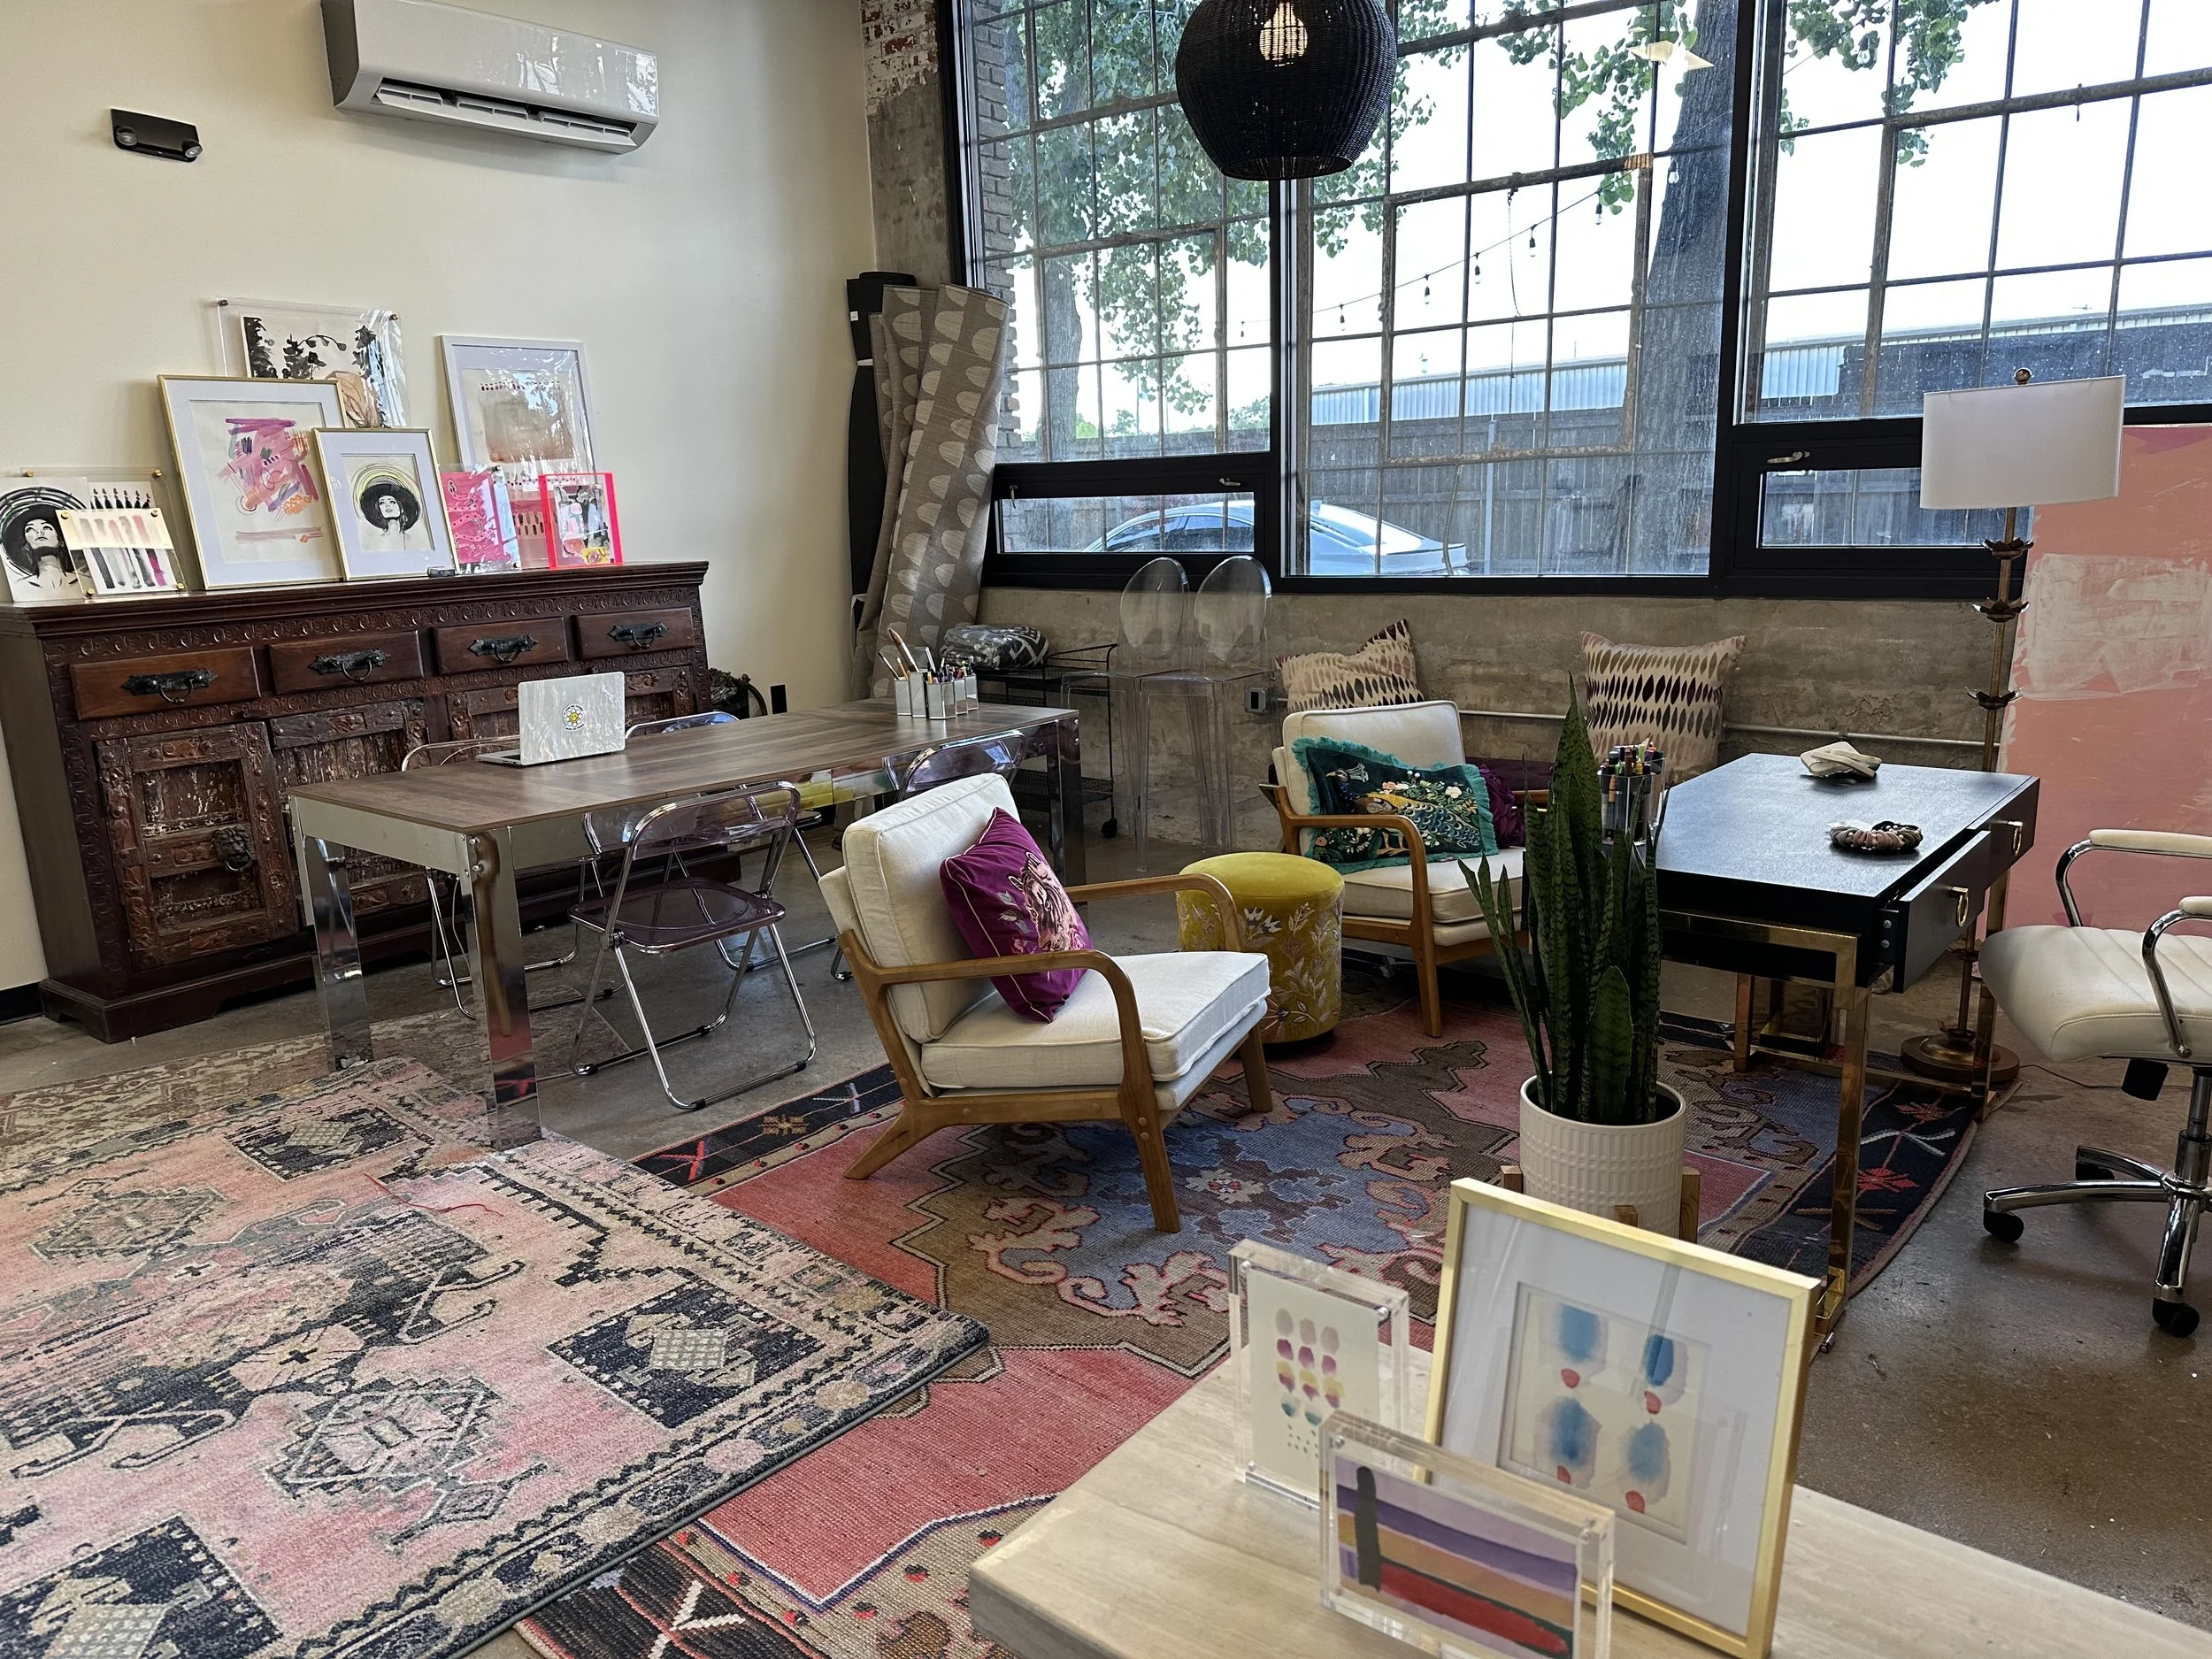
My art studio before I moved In. Areas to tackle: industrial feel, exposed ceilings, and concrete floors
When I was planning my art studio layout, a place I had dreamed of having for years, I wanted to have a plan that fueled creativity and housed my colllection of ever growing supplies in an orderly fashion (
no pressure there). To say the least, I was faced with a few challenges. How do I transform the large, open, industrial studio with concrete floors, exposed ceilings, and plenty of square footage—into a multi functional creative hub? I wanted to make it cozy and functional without losing its raw character. This is how I designed a space that is warm, personal, and full of personality.
Start With a Blank Canvas
The first thing I noticed when I walked into this studio, I was intimidated by the size and the concrete floors, but I knew with the right layout it could be my dream studio. I embraced the exposed ceilings and open feel, and began layering warmth through furniture, rugs, and lighting.
Layer Rugs for Warmth & Texture
Concrete floors can feel cold and unwelcoming, but rugs instantly add warmth, dimension, and personality. I have always had a thing for rugs so I was very excited to see how the rugs I chose would go together. I started with a large rug I loved and layered smaller, geometric patterned rugs with similar colors for depth and visual interest.
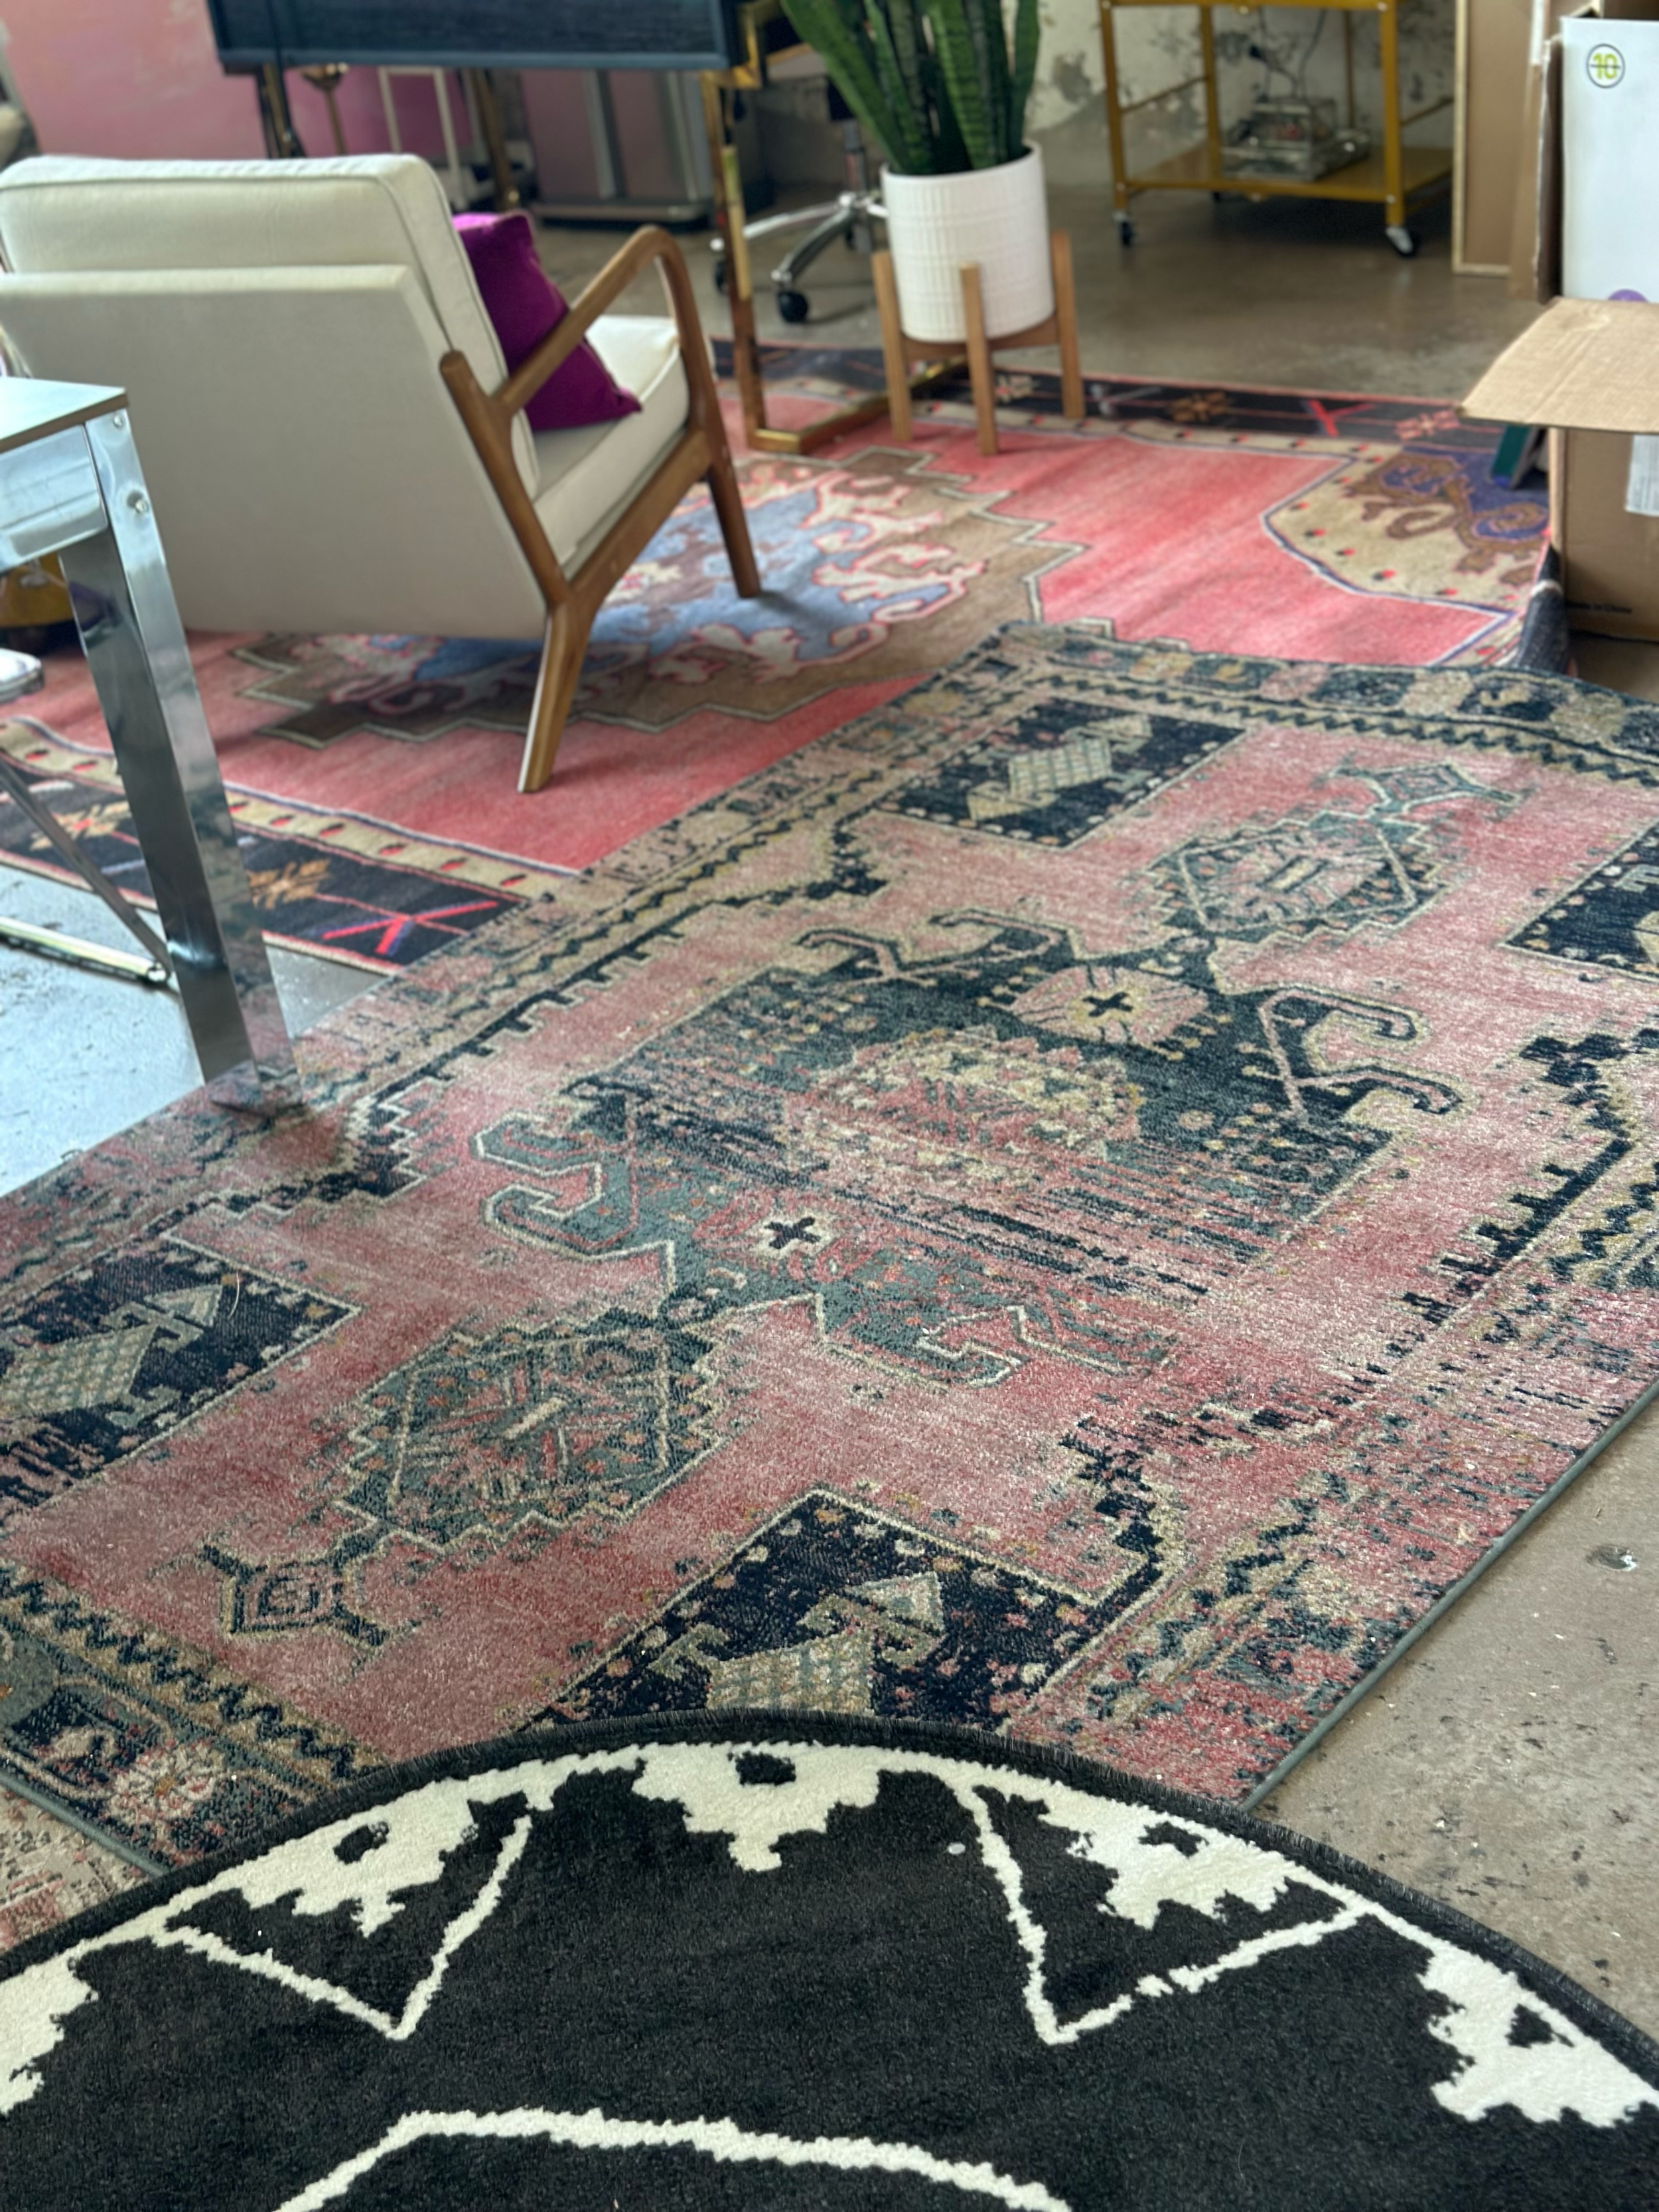
Rugs from Amazon


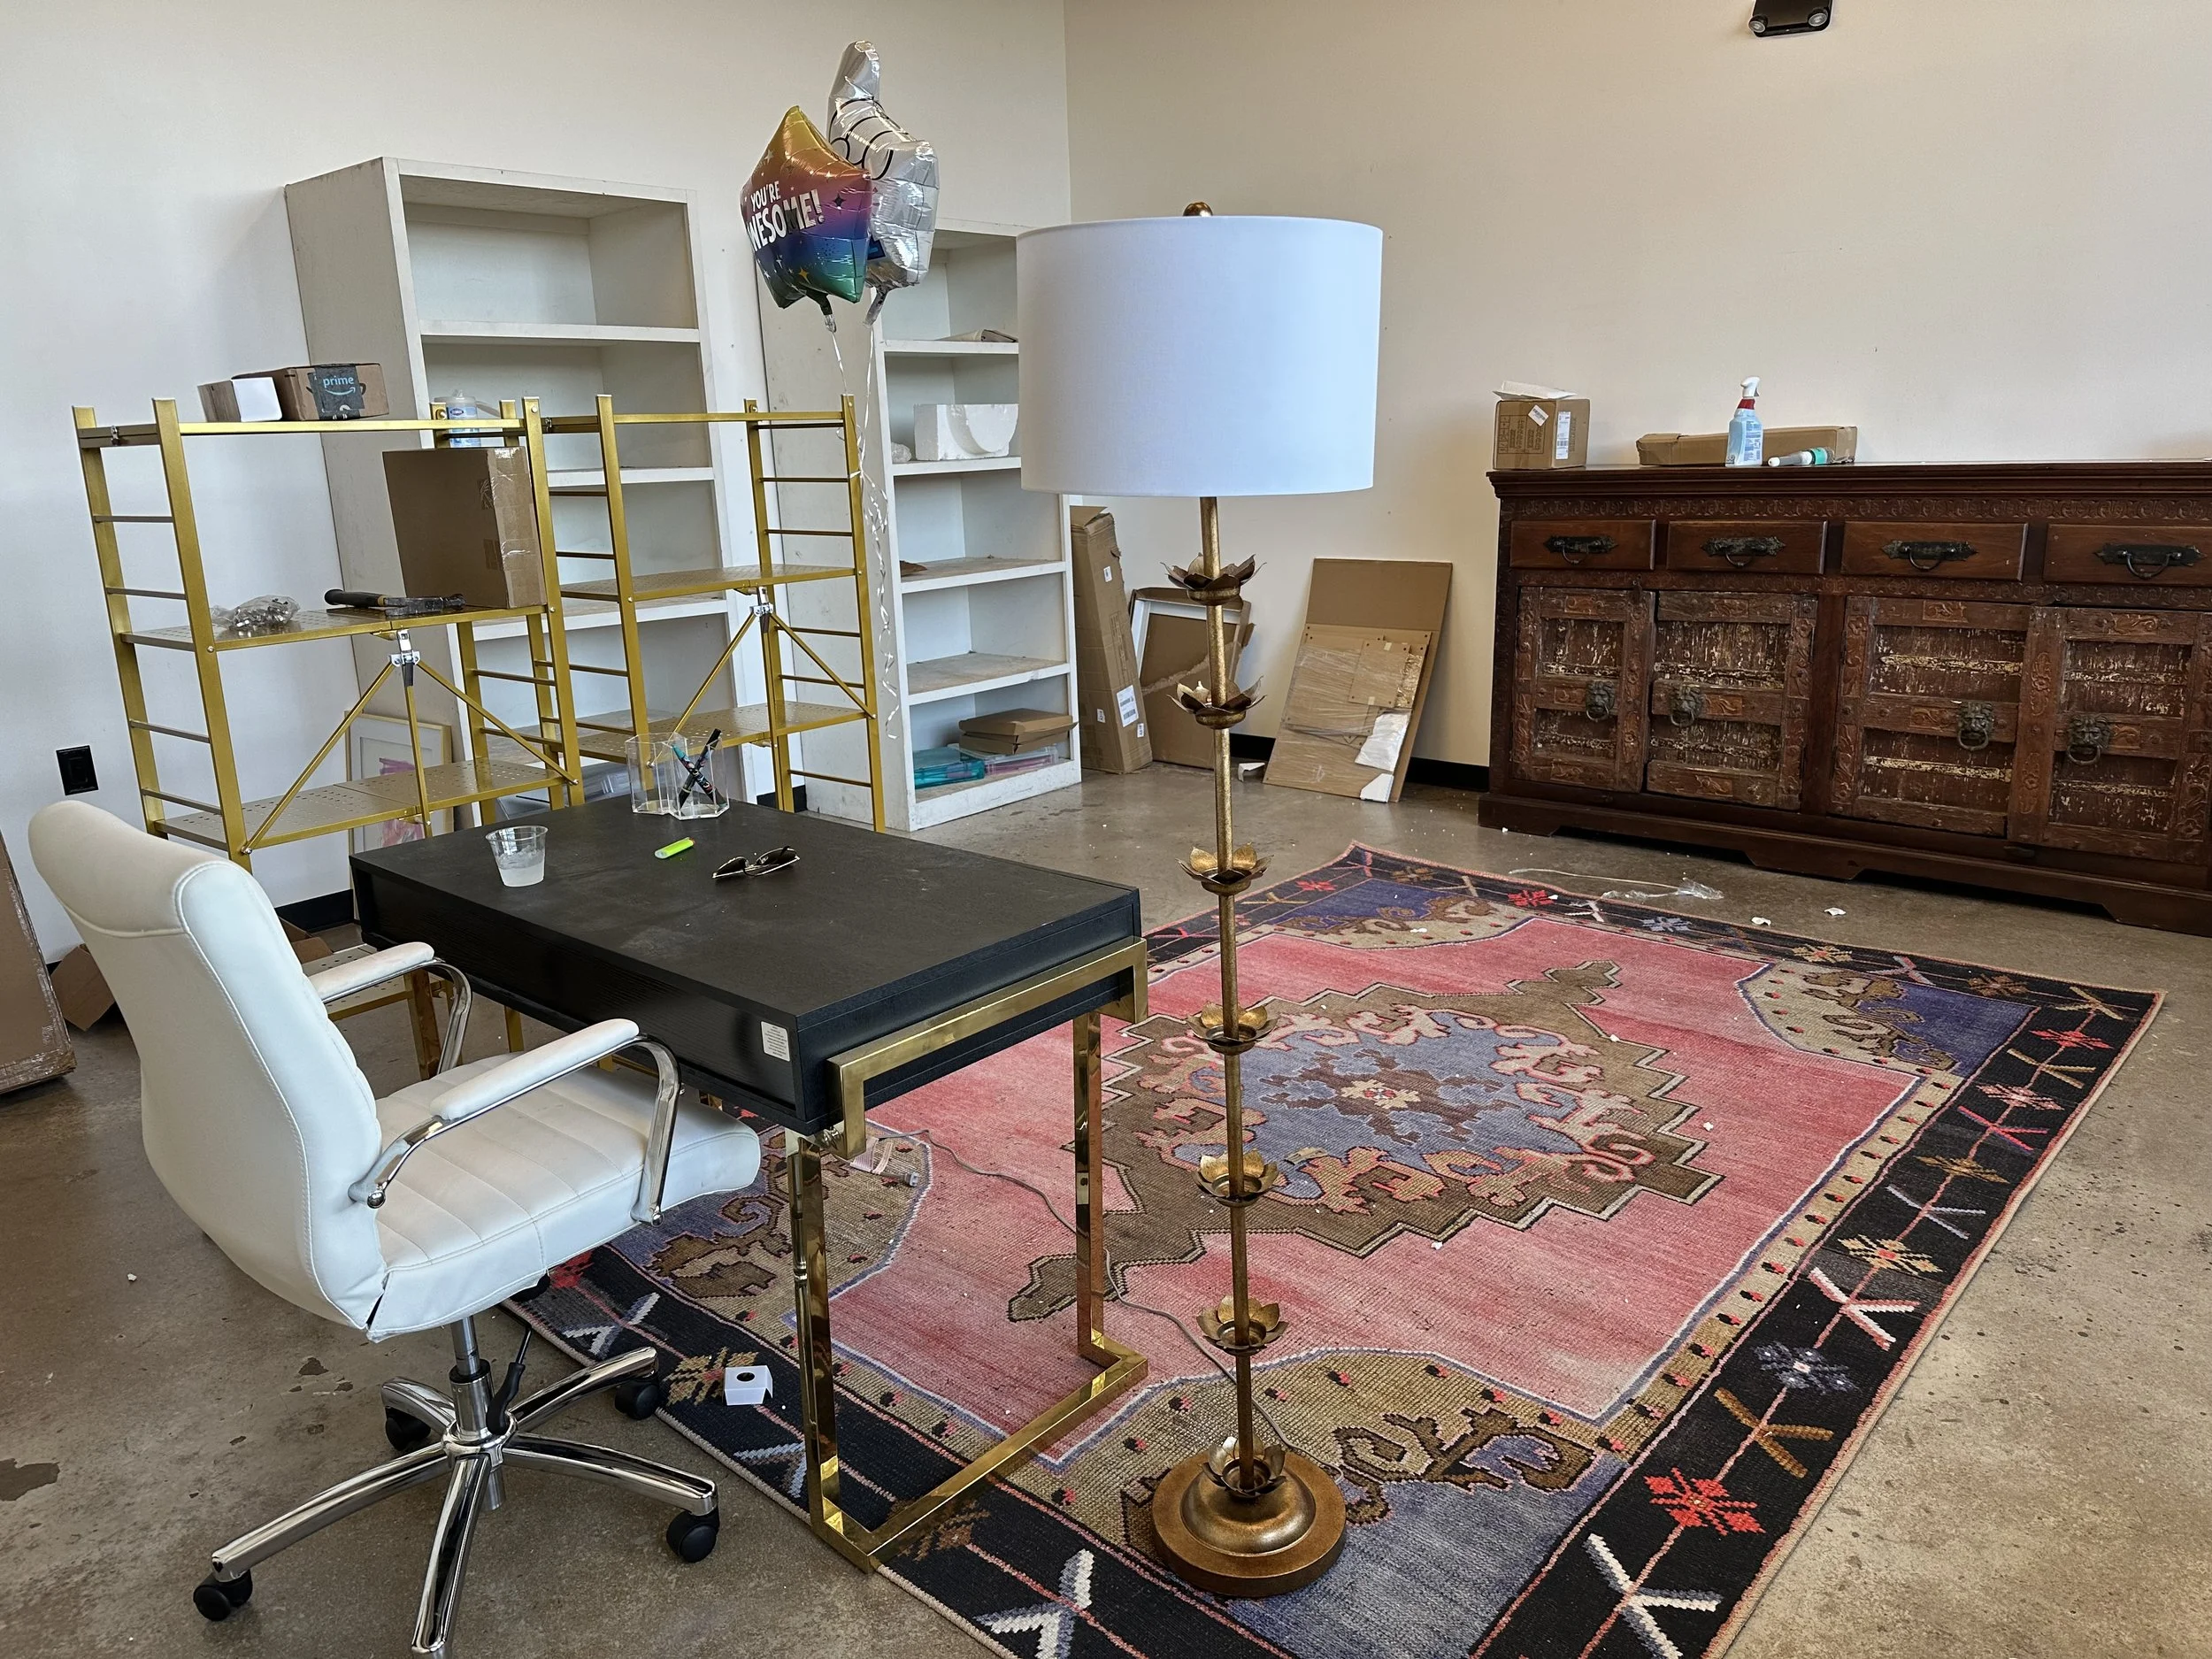
Create Functional Zones
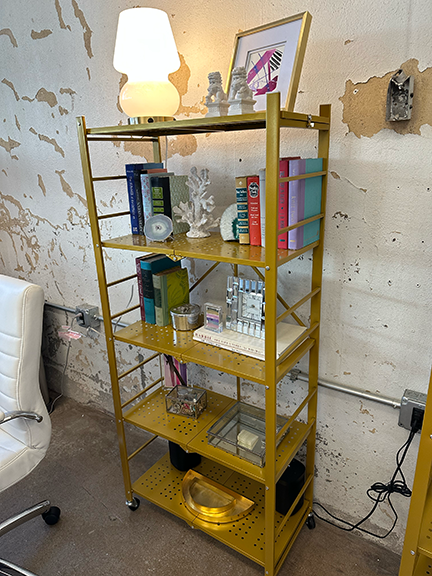
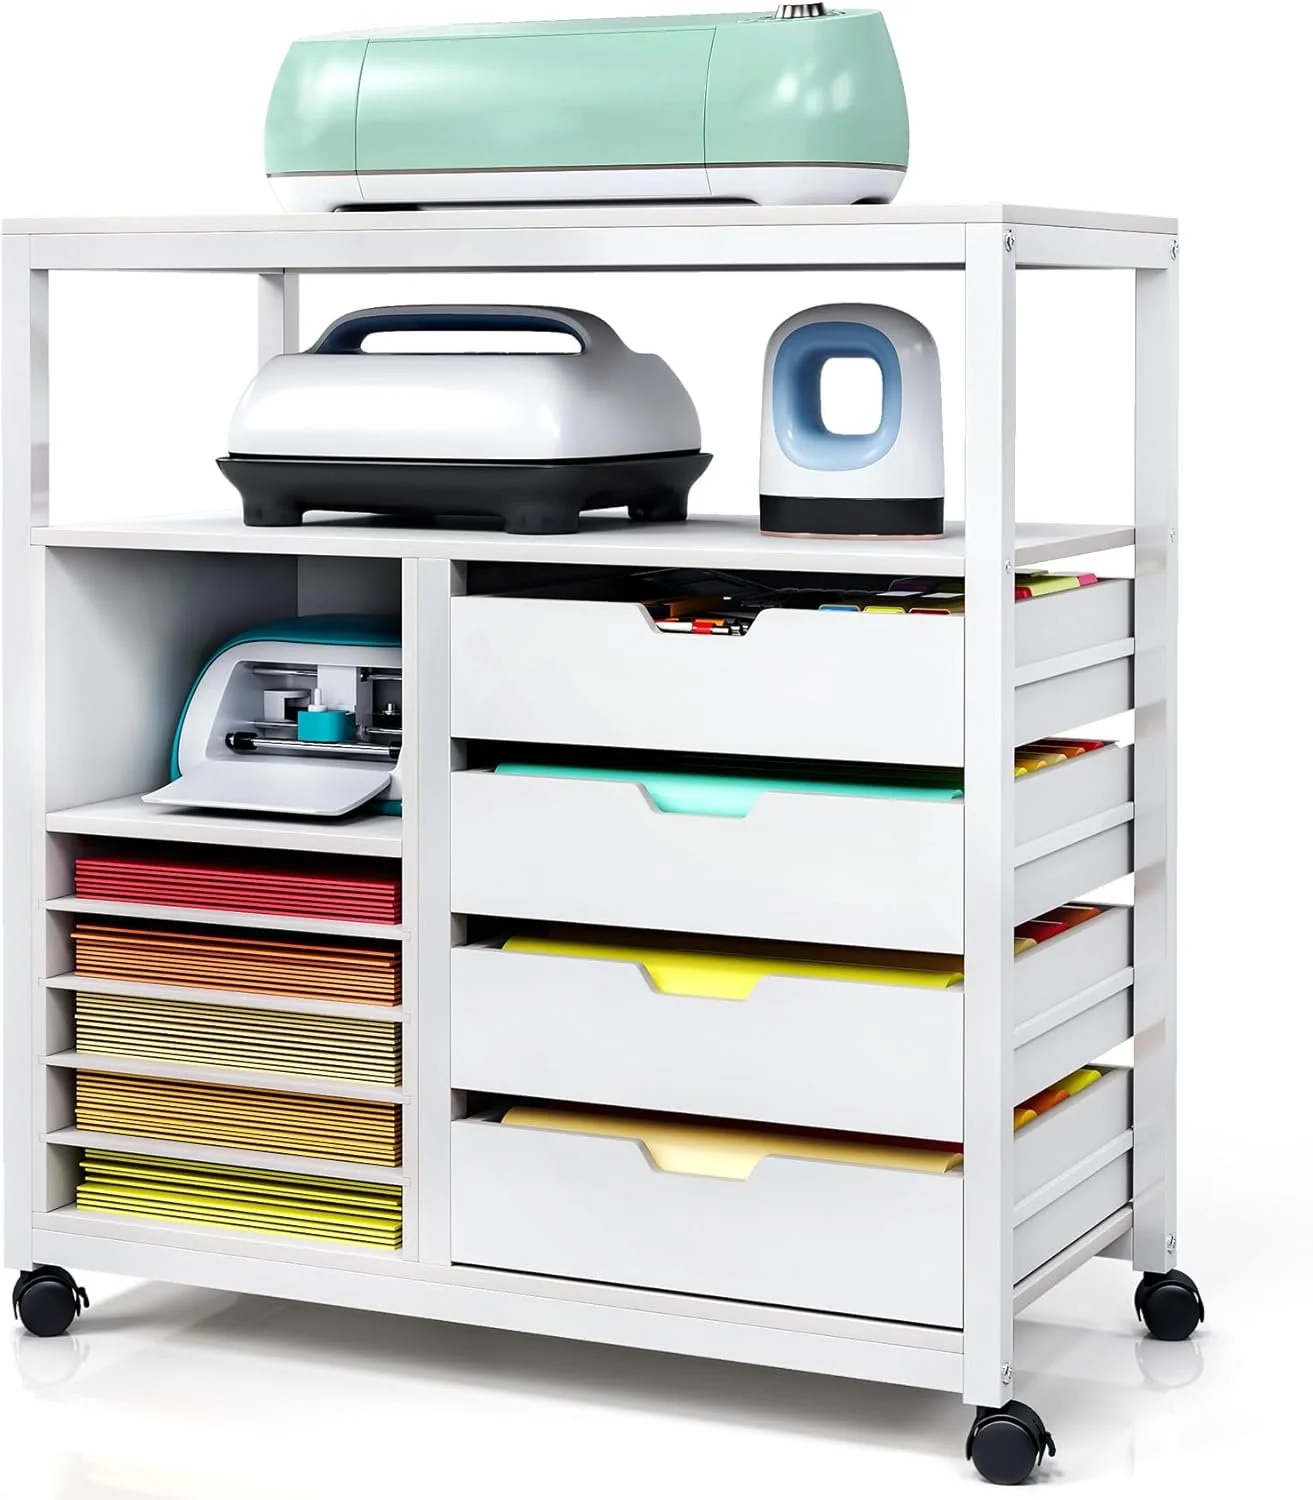
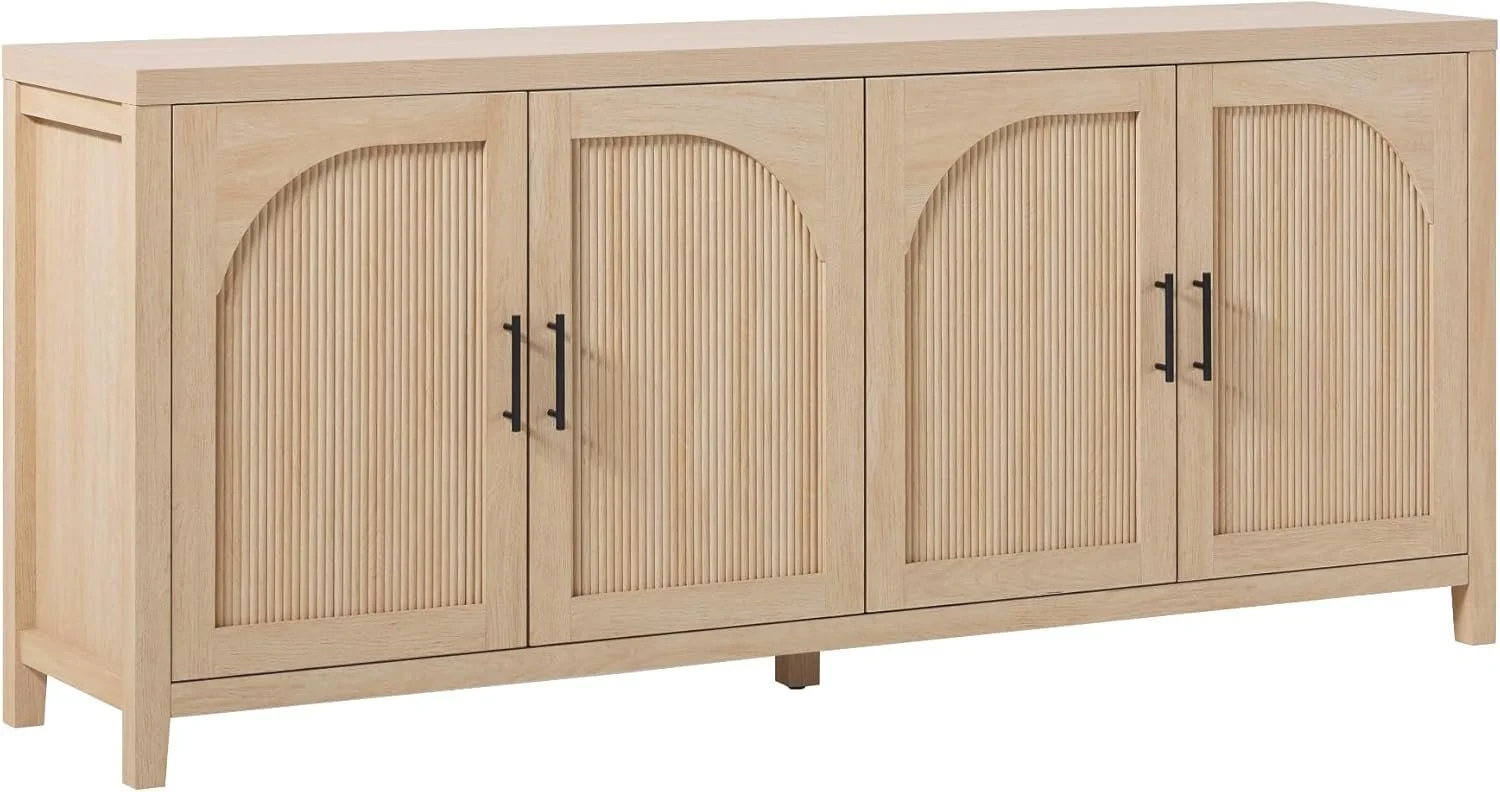
Instead of following a “traditional” studio layout I asked myself what I wanted to accomplish in the space. I created zones that housed my needs and enhanced my creative flow. I do not have a typical easle because I don’t work well on one. My Cricut cart rolls wherever I need it, my work table is on wheels, and storage shelves double as décor. This setup makes it easy to switch between painting, Cricut projects, and content creation. I have a desk and sitting area for meetings, a set of shelves on rollers, one to have my books and personal effects on to make it feel warm, like my space, and another for craft supplies. I chose a huge sideboard to store the supplies that are an eyesore. It helped to scale down the room and offers so much concealed storage.
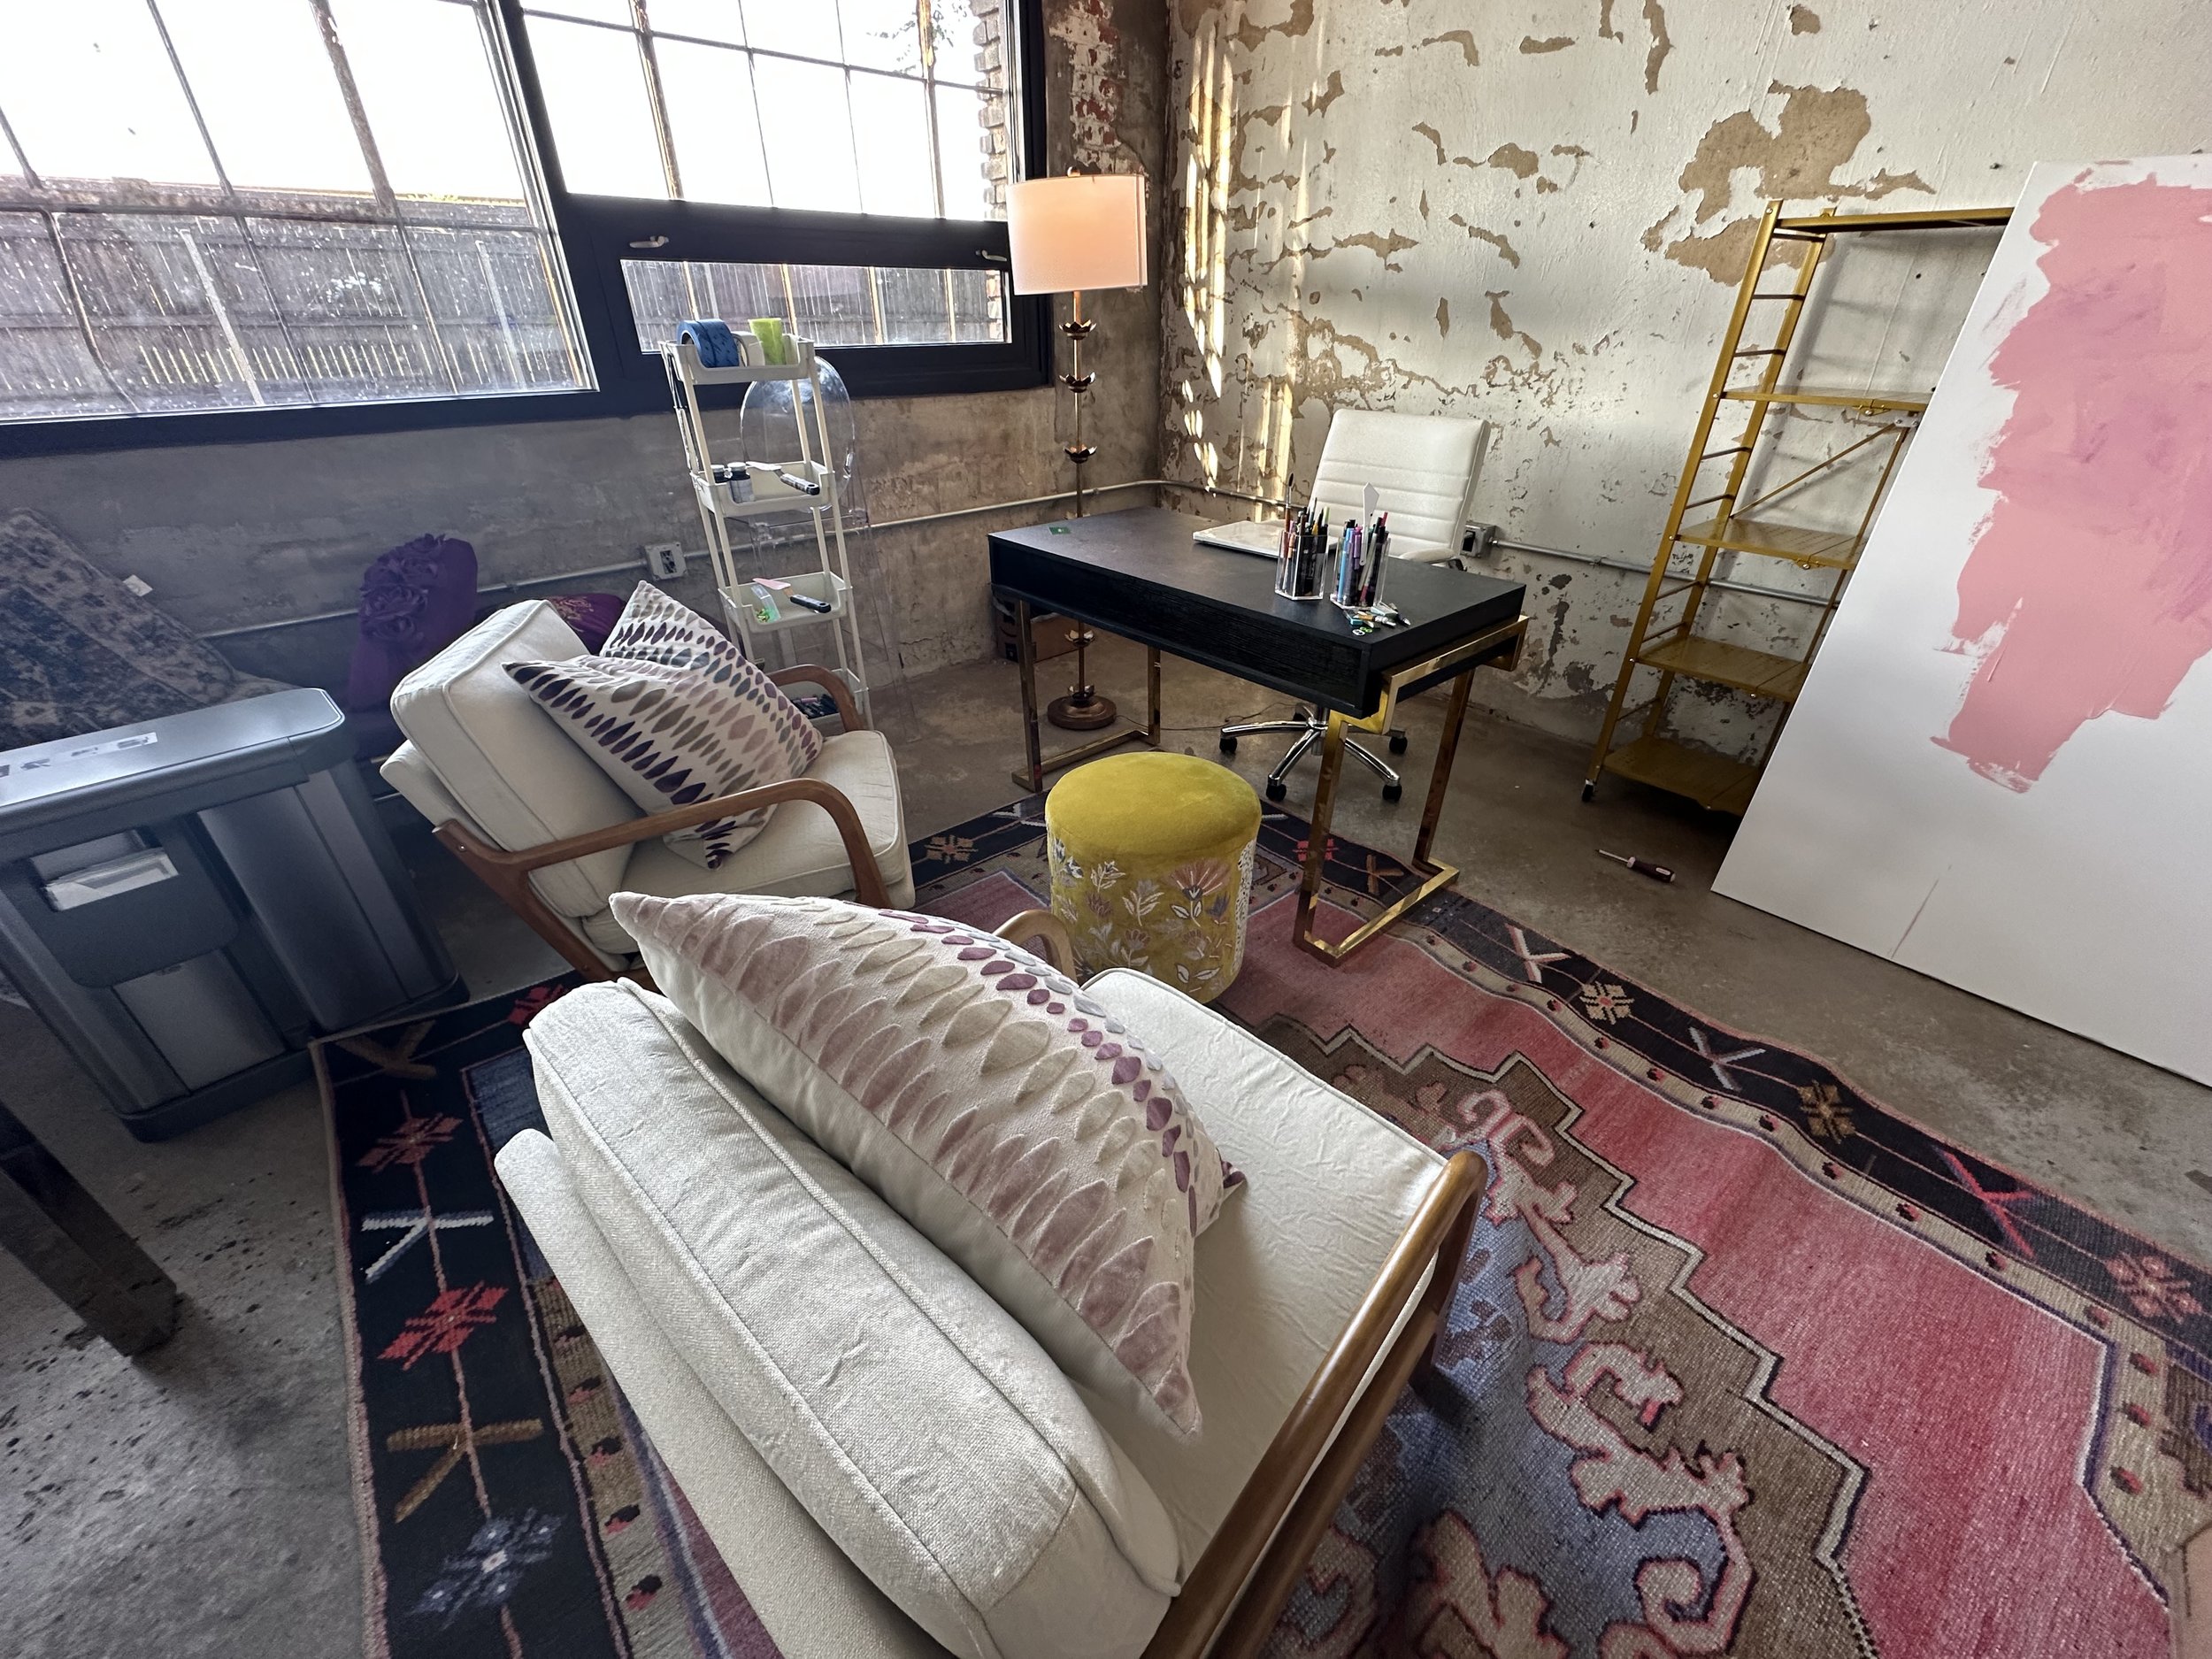


Infuse Personality in the Details
Your studio should reflect YOU. I added framed prints, personal trinkets, and styled shelves to make the space feel inspiring. A gallery wall mixes my own artwork with favorite finds, giving me a mood-boost every time I walk in.

Large Buffet Helps Scale Down the Room and Offers Concealed Storage
Closing Thoughts
A creative studio isn’t just about organization; it’s about creating a space that fuels your creativity. Forget the rules—design a space that feels like home, inspires you to create, and evolves with your passions.
Explore The Mood Edit → to shop the exact rugs, carts, and décor pieces I use to make this space mine.
Affiliate Disclaimer:
This post contains affiliate links. As an Amazon Associate, I may earn from qualifying purchases at no additional cost to you. I only share products I genuinely use and love.

Welcome to the mood room
It all begins with an idea.

Welcome to The Mood Room
Step inside. This is a blog aimed towards creatives, artists, and crafters can share projects, get inspired, and create. It’s a space where creativity, emotion, and imagination collide. The Mood Room was born from the belief that art is more than something to hang on a wall. Art is healing. Art is meditation. Art is magic.
Here, you’ll find stories behind the canvas, the messy middle of the creative process, and the surprising ways art shapes our daily lives. My hope is that each visit feels like stepping into a space that reflects not just my mood, but yours too—a place where you can find yourself in the colors, textures, and unexpected turns of expression.
In the weeks ahead, I plan on sharing:
Behind-the-scenes looks into my studio and works in progress.
Tips and inspiration for making art a part of your everyday life.
Spotlights on artists who are shaping and healing communities with their work.
Playful experiments that blur the line between art, fashion, and living spaces.
The Mood Room isn’t static. It changes with the people who enter it, the art that fills it, and the moods that guide it. Whether you’re here for inspiration, curiosity, or a spark to create something of your own—you belong.
So, welcome in. Take off your shoes, bring your uniqueness, your wonder, your inventive ideas and most importantly, your love to create. Let’s see what we can create together.

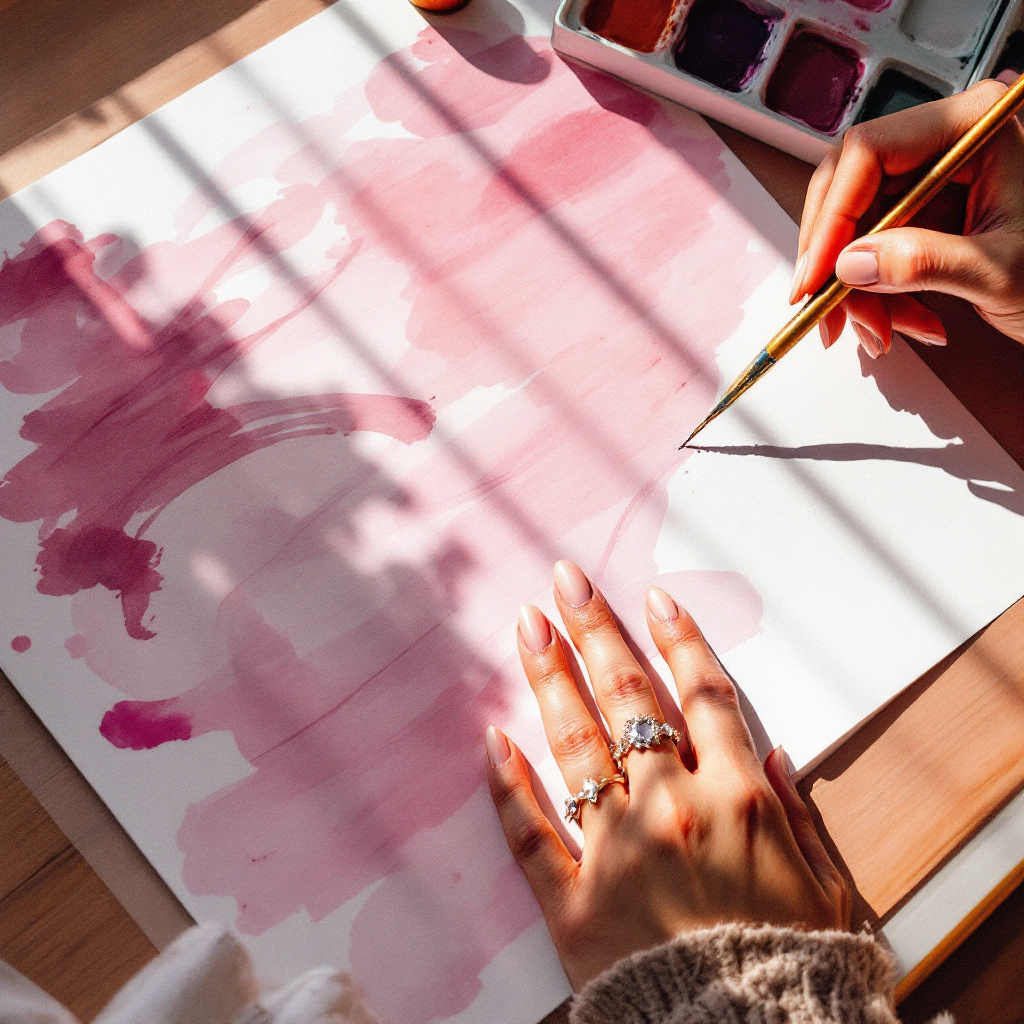
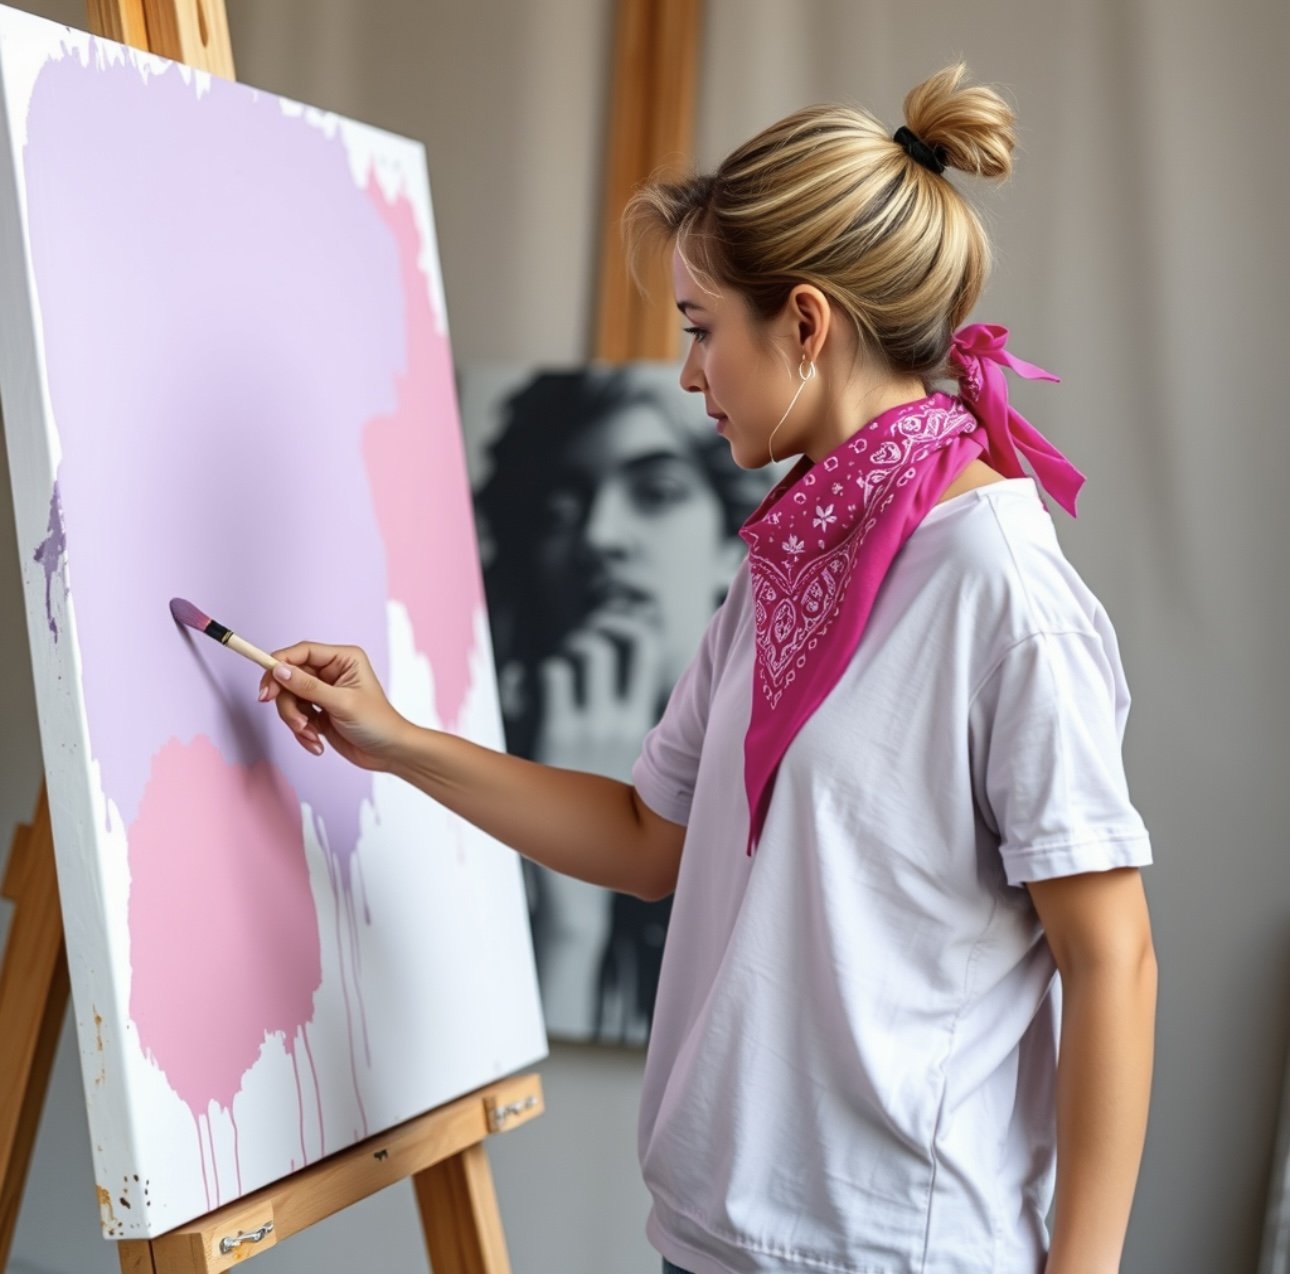
The Flow State and the Other Side: Why Artists May Be Closer Than They Realize
It all begins with an idea.
Flow is the state where time dissolves, and creation comes alive.
What Is the Flow State?
Have you ever lost track of time while creating? The brush seems to move on its own, words spill faster than you can think, or a melody feels like it arrives fully formed. This is the flow state—a term psychologists use to describe the mental zone where challenge and skill perfectly meet (Csikszentmihalyi, 1990).
For artists, flow is where time loosens and creation deepens. It is the state where many masterpieces take shape.
“Flow is the place where time disappears and creation happens.”
In a flow state, two hours can feel like ten minutes
What Flow Feels Like
In flow, ordinary time dissolves. Ten minutes may feel like hours, or hours like minutes. Your mind, hands, and heart seem to work together without resistance. Every move feels natural—less like invention, more like uncovering.
Neuroscientists have found that during flow, the brain quiets the part responsible for self-criticism while releasing dopamine and endorphins (Dietrich, 2004). This helps explain why flow feels at once peaceful and powerful.
When Artists Say It Was “Given”
Across history, some artists and songwriters have described their best work as feeling given—as if it came from somewhere beyond themselves. This is not the claim of every artist, but the stories repeat: the poem that seemed to write itself, the melody that arrived whole, the painting that appeared before the first stroke.
These accounts suggest that in deep flow, creators sometimes feel more like channels than makers.
“Some artists and songwriters have described their best work as feeling given—as if it came from somewhere beyond themselves”

People swear that what we know as ‘masterpieces” came from a source beyond themselves
Clairvoyants and Psychics: A Similar State
Clairvoyants, psychics, and mystics describe entering states that sound remarkably similar to flow: timelessness, openness, and a receptive awareness where information seems to arrive. They often frame this as “receiving messages from the other side.”
This doesn’t mean every artist is channeling spirits—it means the experiences overlap. Both artists in flow and psychics in their practice describe being in a receptive state where something greater than ordinary thought comes through.
What the Powerful Seek
Interestingly, artists and mystics are not the only ones interested in these states. Some of the world’s most powerful leaders have sought similar insights when ordinary strategy is not enough.
Business Insider profiled Kate Tomas, a psychic who has advised corporations, governments, and celebrities.
Fortune reported that executives sometimes consult psychics and astrologers when data cannot provide clarity (Fortune, 2015).
Vice revealed that some companies have even hired psychics as consultants, bringing these perspectives into boardrooms.
When facing complex or high-stakes choices, leaders sometimes look beyond conventional tools—toward sources others might dismiss.
“When data isn’t enough, some leaders look for insight from the unseen.”

Even CEOs have sought insight beyond strategy—artists may already be close.
Why This Matters for Artists
So why does this matter for artists?
Because the flow state that you naturally enter when you create—the state where time dissolves and focus deepens—is not so far from the state mystics and psychics describe, or the one leaders sometimes seek out.
This doesn’t mean every artwork is a channeled message. It means that as an artist, you may already be standing near the threshold of the same receptive space. And perhaps, if you listen in those moments, something surprising may arrive—something larger than you imagined.
“Artists may be one step from the same receptive state that visionaries and leaders seek—if we listen.”
Some artists throughout history say their work felt ‘given,’ not made
Flow as Healing and Revelation
Flow is also healing. Research shows it reduces stress, boosts joy, and helps people process trauma (Ulrich, 2016). But its deepest gift may be revelation.
Songwriters say their greatest hits were “downloaded.” Painters describe visions given to them. Writers wake with passages already written. These are not universal experiences, but they are powerful ones.
Maybe flow and the other side are not entirely separate. Maybe they are different ways of touching the same current of creativity and insight.
Final Thoughts
Flow state is where art comes alive, where time disappears, and where creators do their best work. Sometimes, artists have felt that their creations were given to them. Mystics describe receiving in similar states. Leaders sometimes seek that perspective when strategy alone falls short.
So perhaps the next time you lose yourself in flow, pause for a moment. Notice what comes through.
Flow may be more than focus. It may be a place where, if we listen, we stand just close enough to hear something greater.

Mastering the Art of Layering Rugs & Mixing Patterns
It all begins with an idea.
Mastering the Art of Layering Rugs & Mixing Patterns
by viddypopstudio
Rugs aren’t just floor coverings—they’re mood-makers, story-tellers, and style elevators. And here’s the insider trick: layering rugs and mixing patterns. Done right, this styling move instantly makes your space look designer without being fussy. Think of it as fashion for your floors.
Below, you’ll get layering basics, styling tips, and 5 shoppable rug sets (with affiliate links!) you can use to recreate the looks in your own home.
Rug Layering 101: The Basics
Start with a base rug: Large, neutral, and grounding—think beige, gray, or natural jute.
Add a statement rug: Smaller, patterned, or bolder in color.
Mix textures: Fluffy shag + flatweave = cozy sophistication.
Play with scale: Big prints + small repeats keep the look balanced.
Match function to space: Plush in bedrooms, durable in dining rooms.
Shop These Rug Layering Combos
Here’s where it gets fun—five curated rug sets you can mix, match, and layer to create instant personality.
1. 🐱 Whimsical Geometrics
Playful and modern, perfect for studios or creative corners.
• Pink Cat Rug
• Yellow Square Rug
• Shape Rug

2. 🐆 Bold & Graphic
For the fearless decorator: animal prints + sharp geometrics.

3. 🩷 Playful Pastels
Sweet, soft tones with a wild cheetah twist.
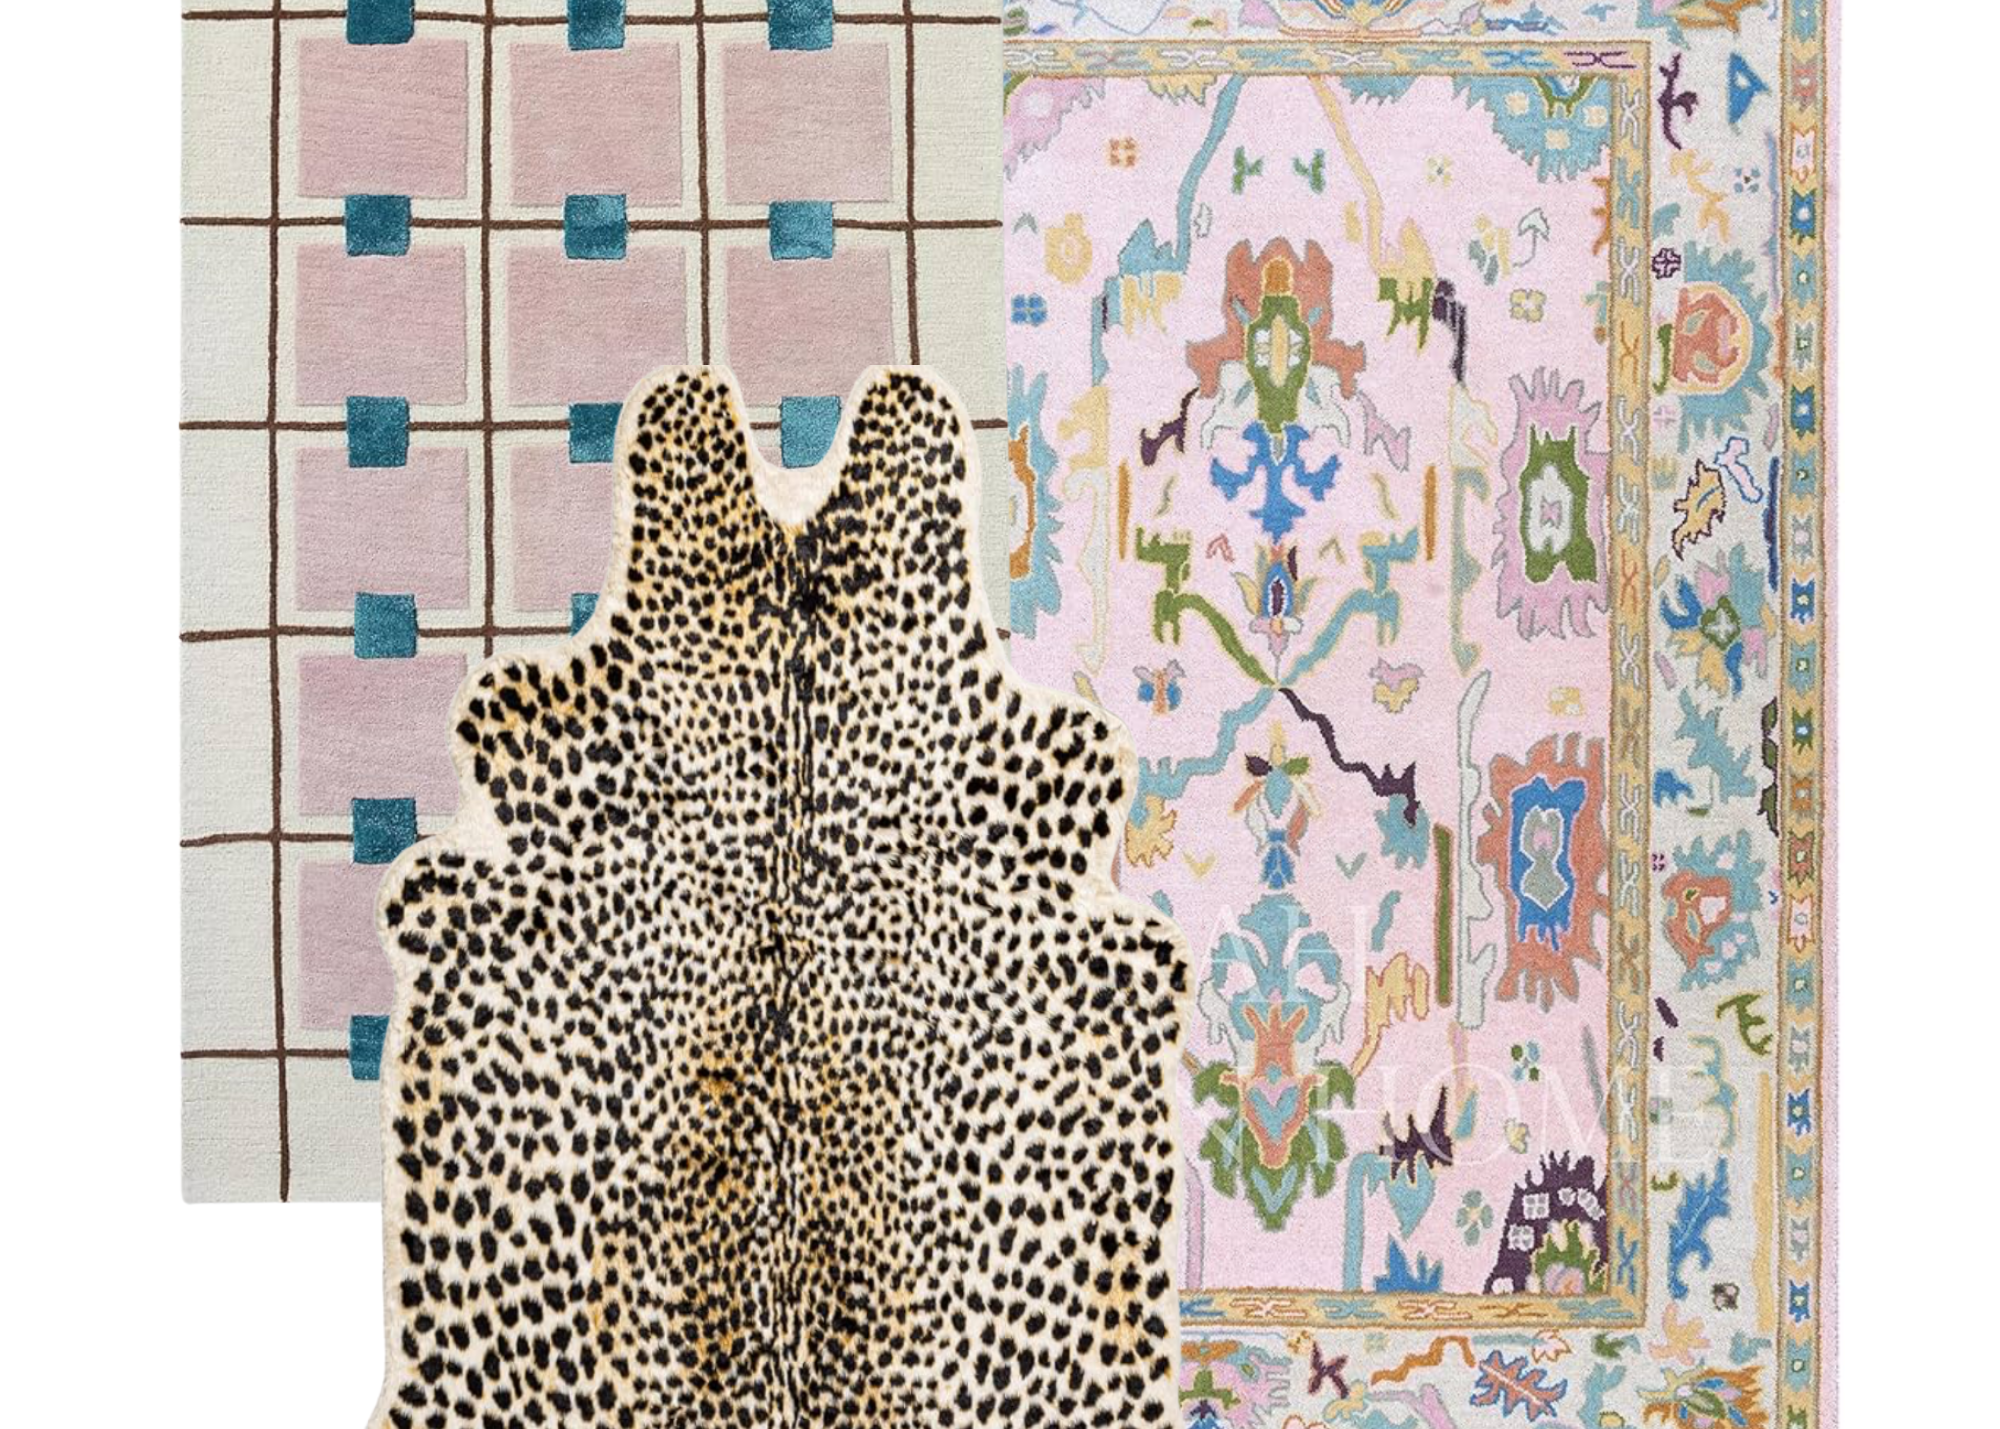
4. 💜 Woodland Whimsy
A storybook vibe—lavender softness, scalloped edges, and a touch of nature.
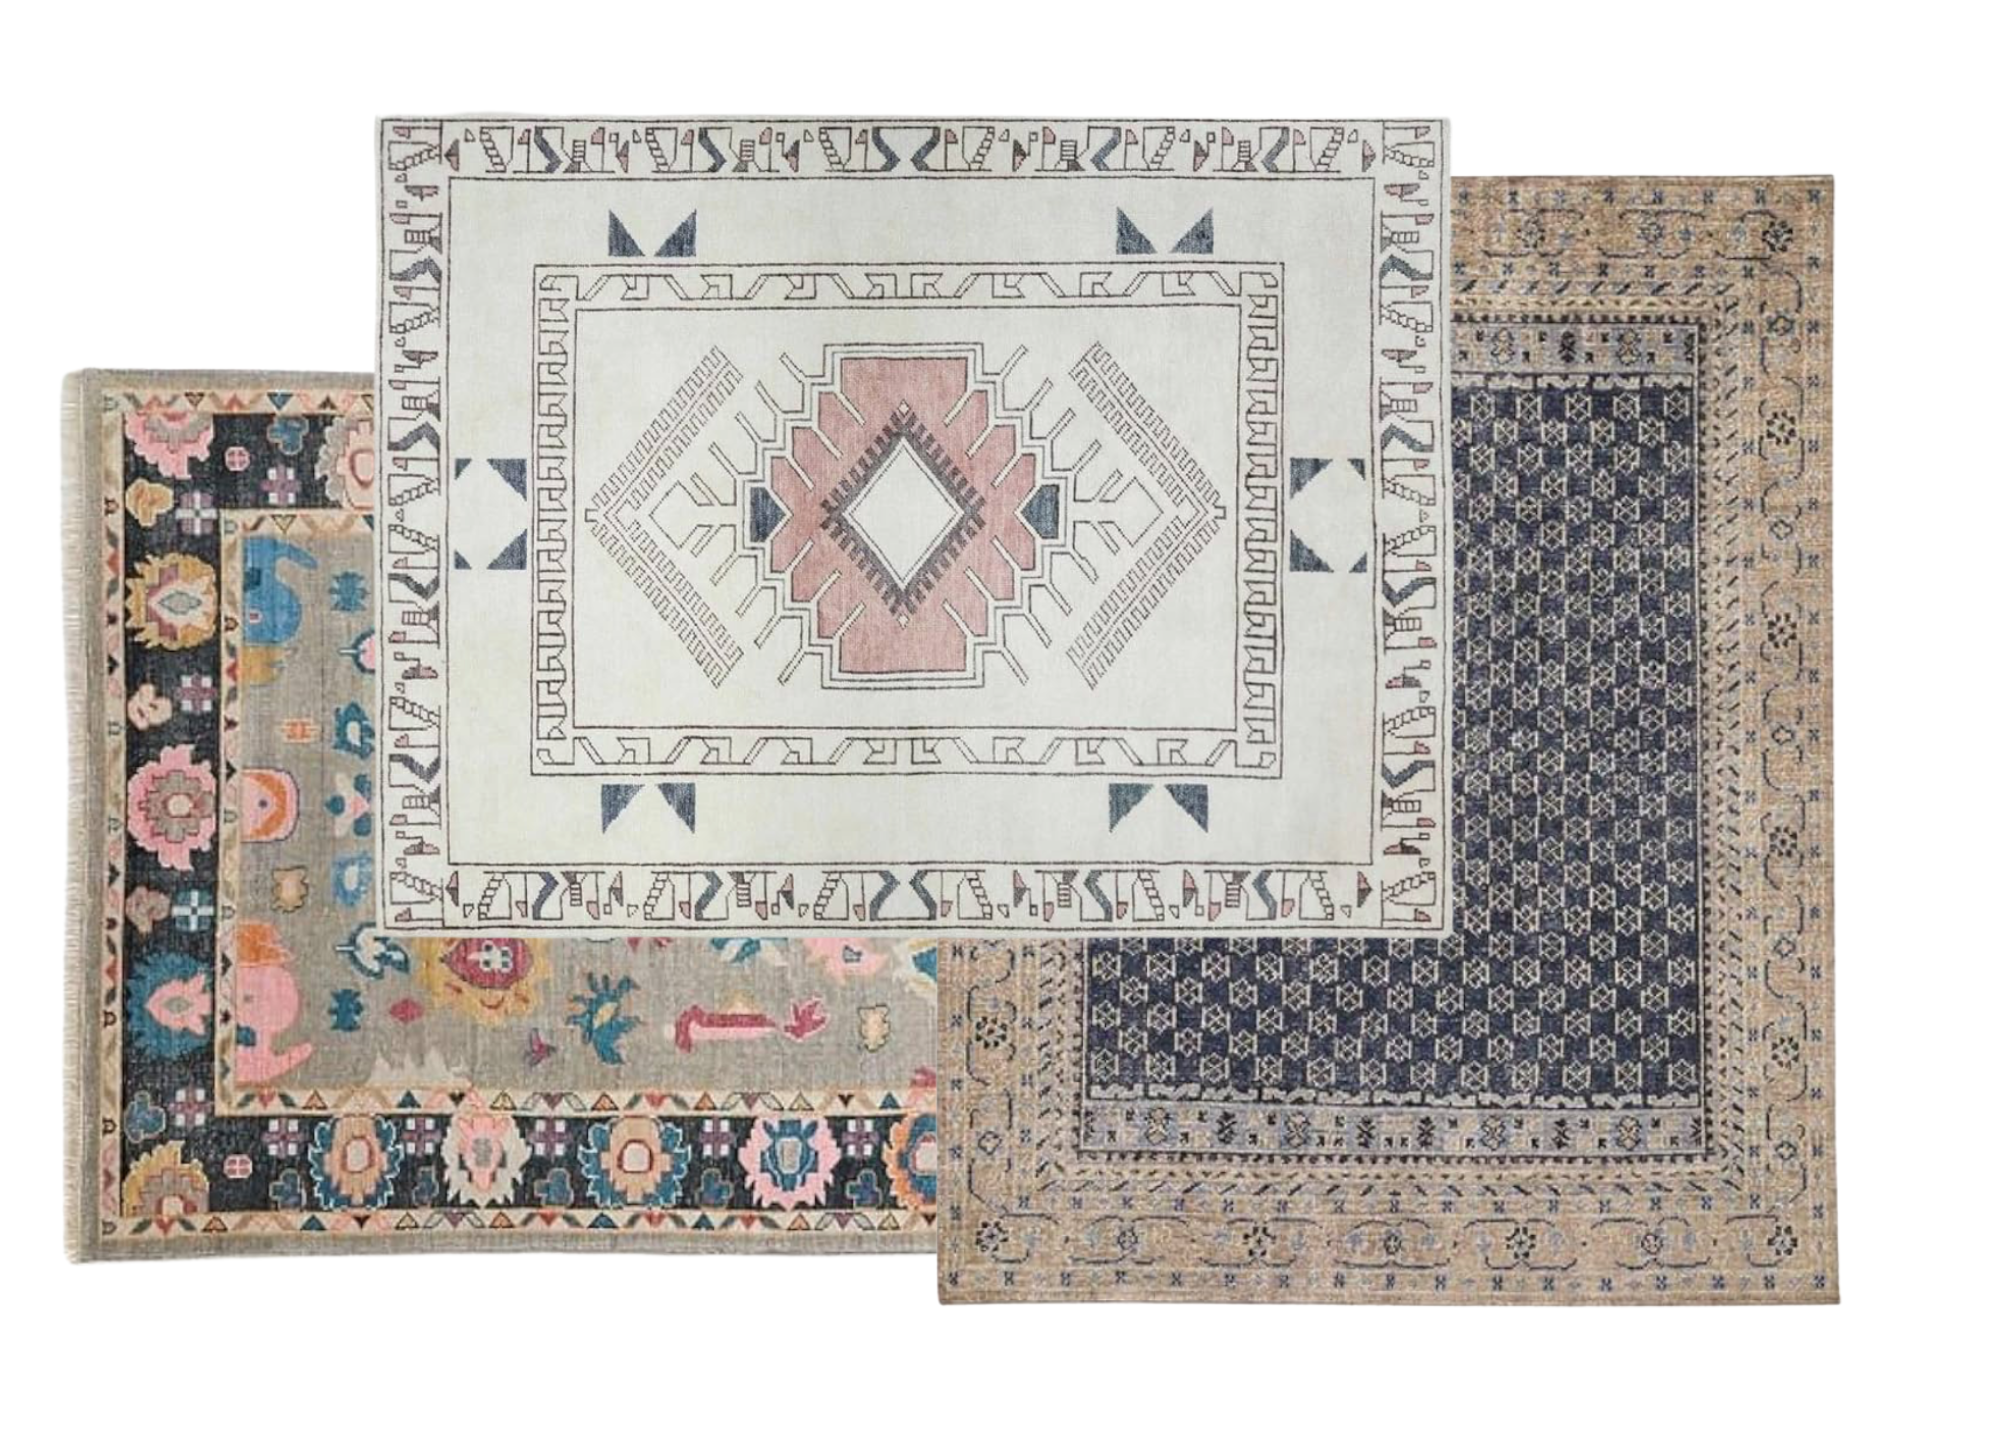
5. 💙 Classic Contrast
Crisp navy and white with a timeless Turkish accent.
Tips for Mixing Patterns Without Stress
Start small: Try a layered runner in your hallway.
Stick to a color family: One shared color pulls everything together.
Balance busy with simple: Stripes are pattern peacemakers.
Keep proportions in mind: Big + small = visual interest.
Care & Maintenance
Vacuum regularly (bonus if you love the “lines in the carpet” look).
Rotate rugs every few months to keep wear even.
For spills: blot, don’t rub.
A well-cared-for rug can last up to 10 extra years—worth the love.
Wrapping It Up
Layering rugs is all about creating a home that feels uniquely you. Whether you’re leaning into whimsy, bold drama, or timeless classics, there’s a layering combo that fits your vibe.
So go ahead—stack those rugs, mix those patterns, and make your floors the star of the show. Your stylish haven is waiting. ✨
👉 Shop my top rug picks above to get started!